Managing students on Edvisor
Understand the Students section and learn how to manage your students on Edvisor.
The Students section in Edvisor is the core of Edvisor's CRM, designed to help you efficiently manage and track your students' database.
All the contacts you add to Edvisor will be displayed here.
Here’s what you can do within this section:
- View Students
- Customize the information
- Filter Students
- Search Students
- Manage Students
Viewing Students
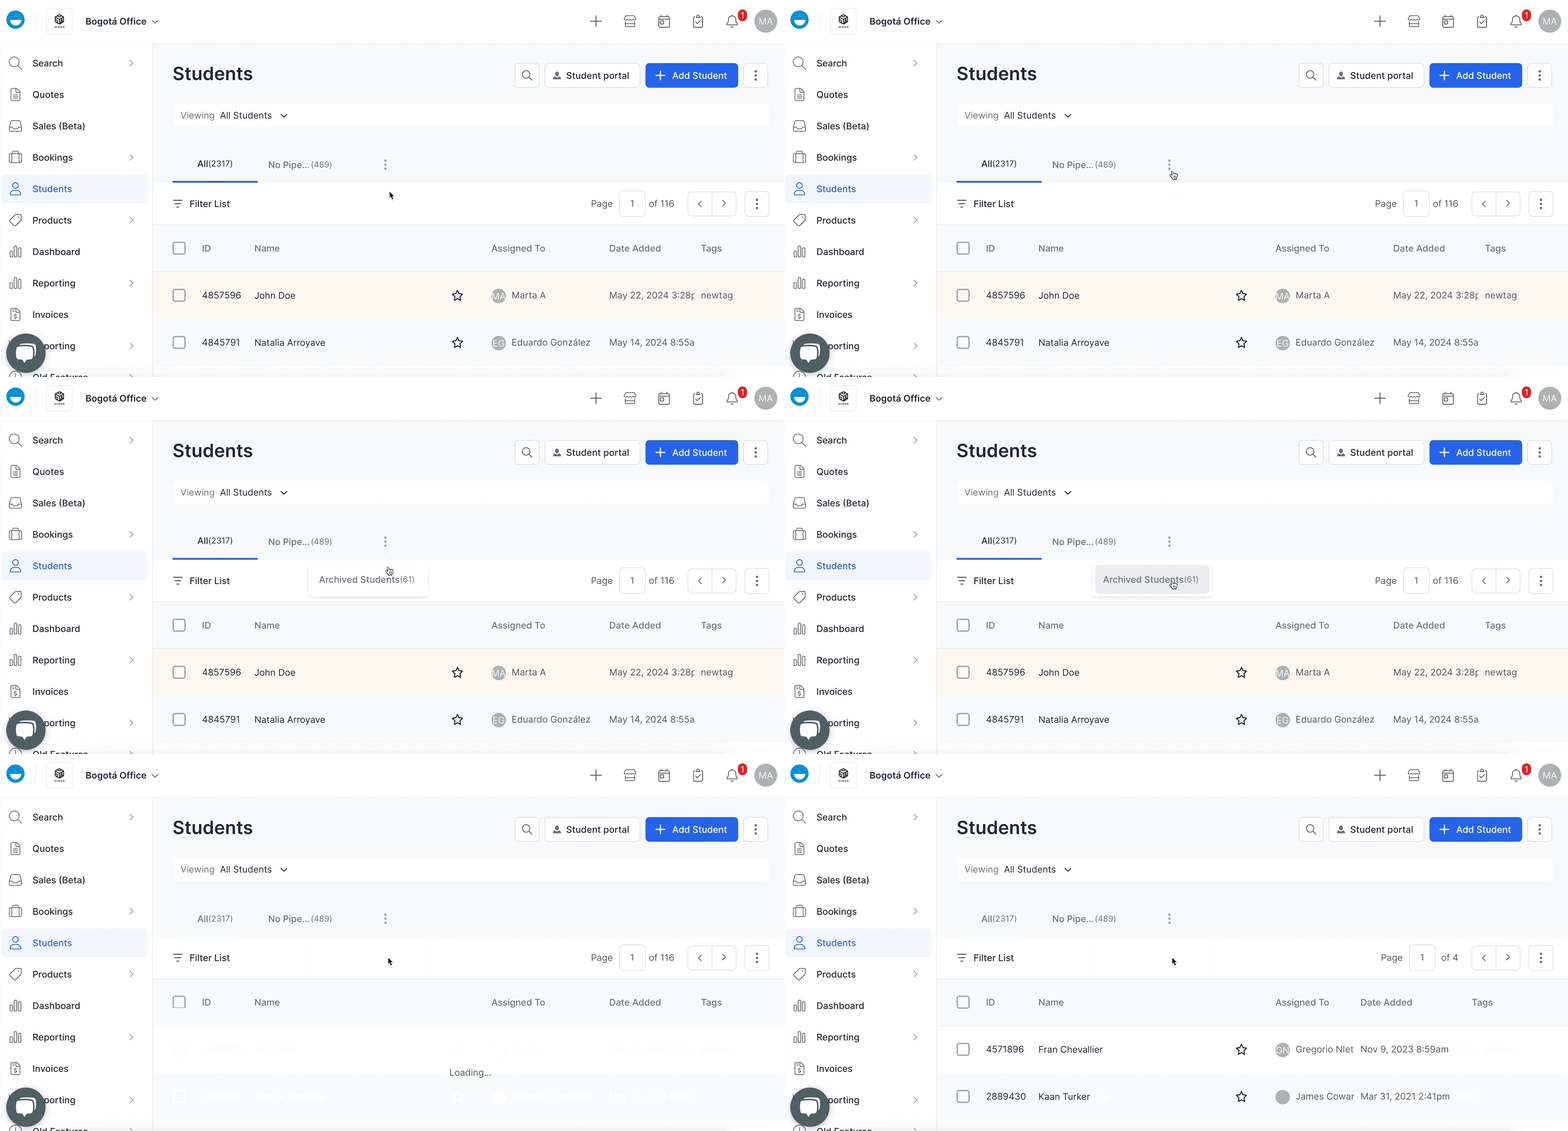
Students on Edvisor are organized in 'Views' or 'Sections.' When you first enter the Students section, you'll see two main views:
🔹 All:
Displays all your active students.🔹 No Pipeline:
Shows students that are not yet assigned to a pipeline.

There are two additional visualization options:
🔹 Archived Students:
Click the three-dot icon next to "No Pipeline" to see your list of archived students.

💡 If you wish to unarchive an archived student, click on the student's name to open their profile and select "Restore Student"

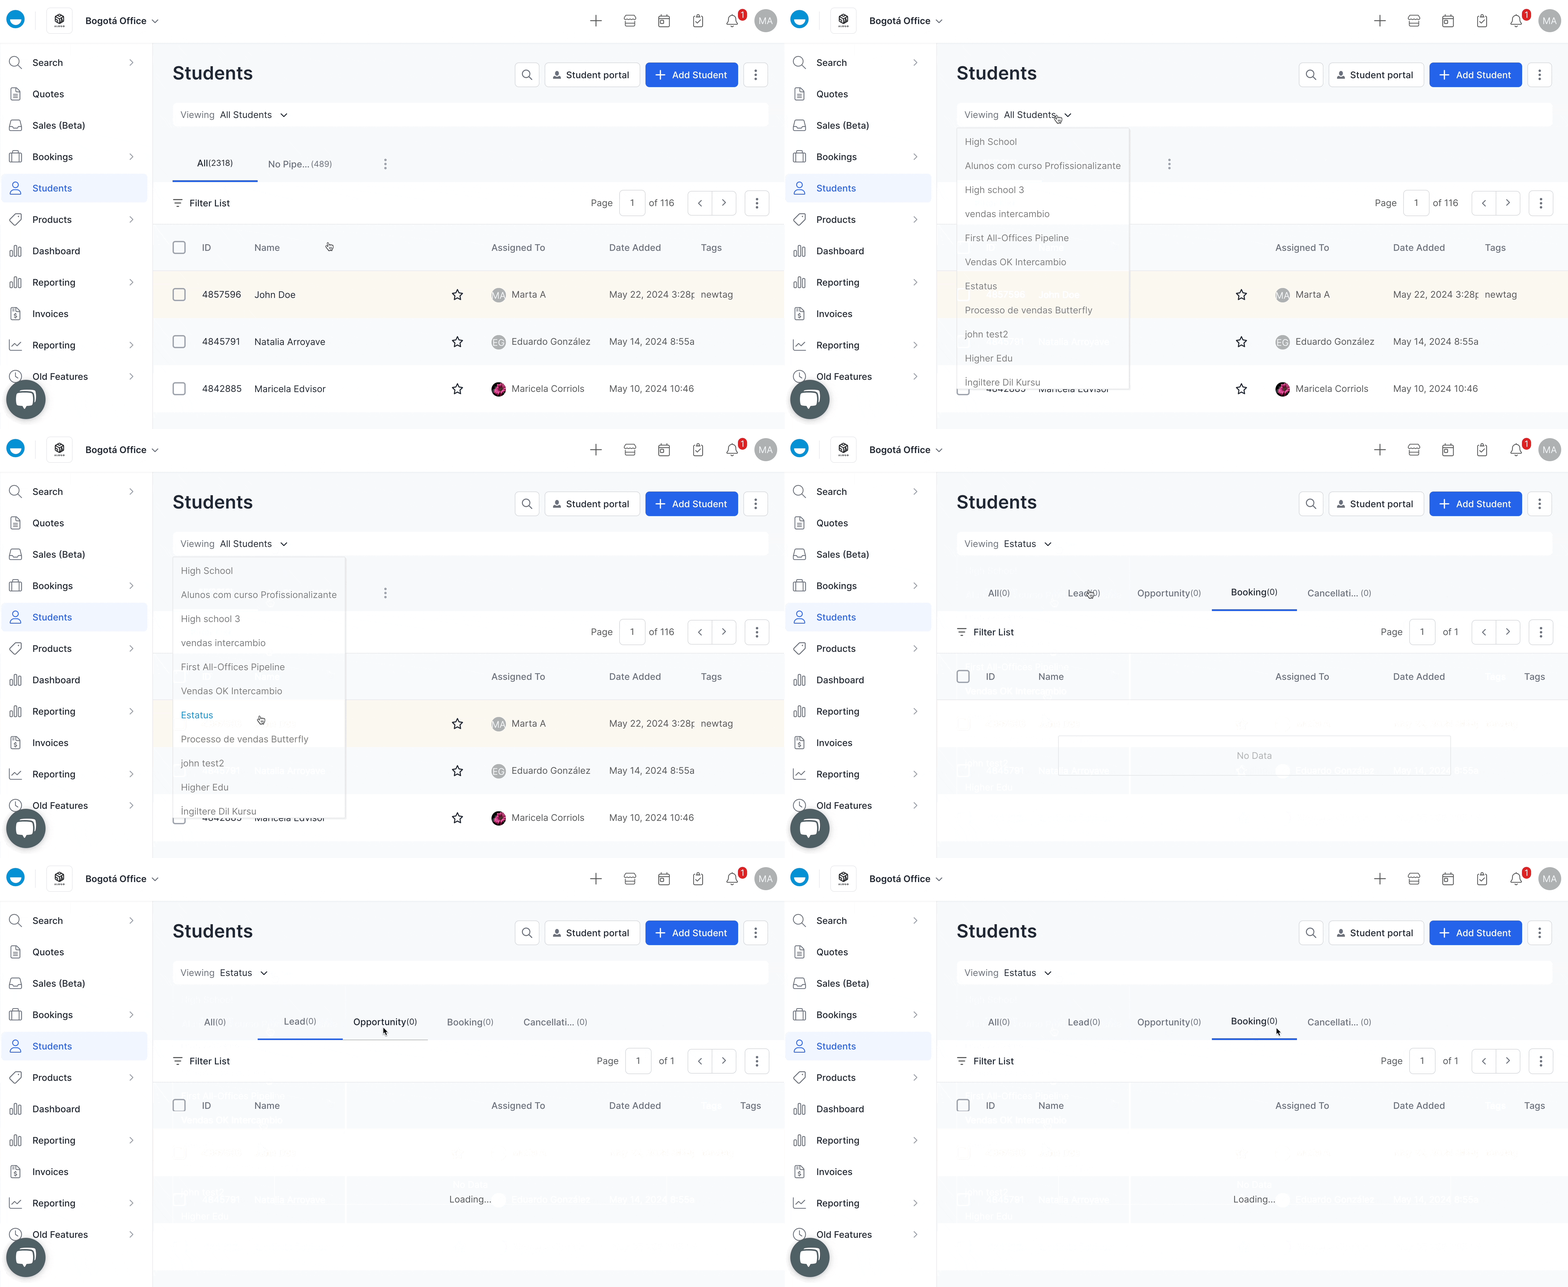
🔹 Student Pipelines:
On Edvisor, you can create different pipelines to organize your leads and sales processes.
📖 A sales pipeline is a visual tool that maps out your sales process by creating different "stages" to organize your leads. Each stage represents a step a prospect takes before becoming a customer.

Customize the information
Any of the previously mentioned views will display students in a list. This list includes various fields that you can see at a glance without needing to open the student's profile.
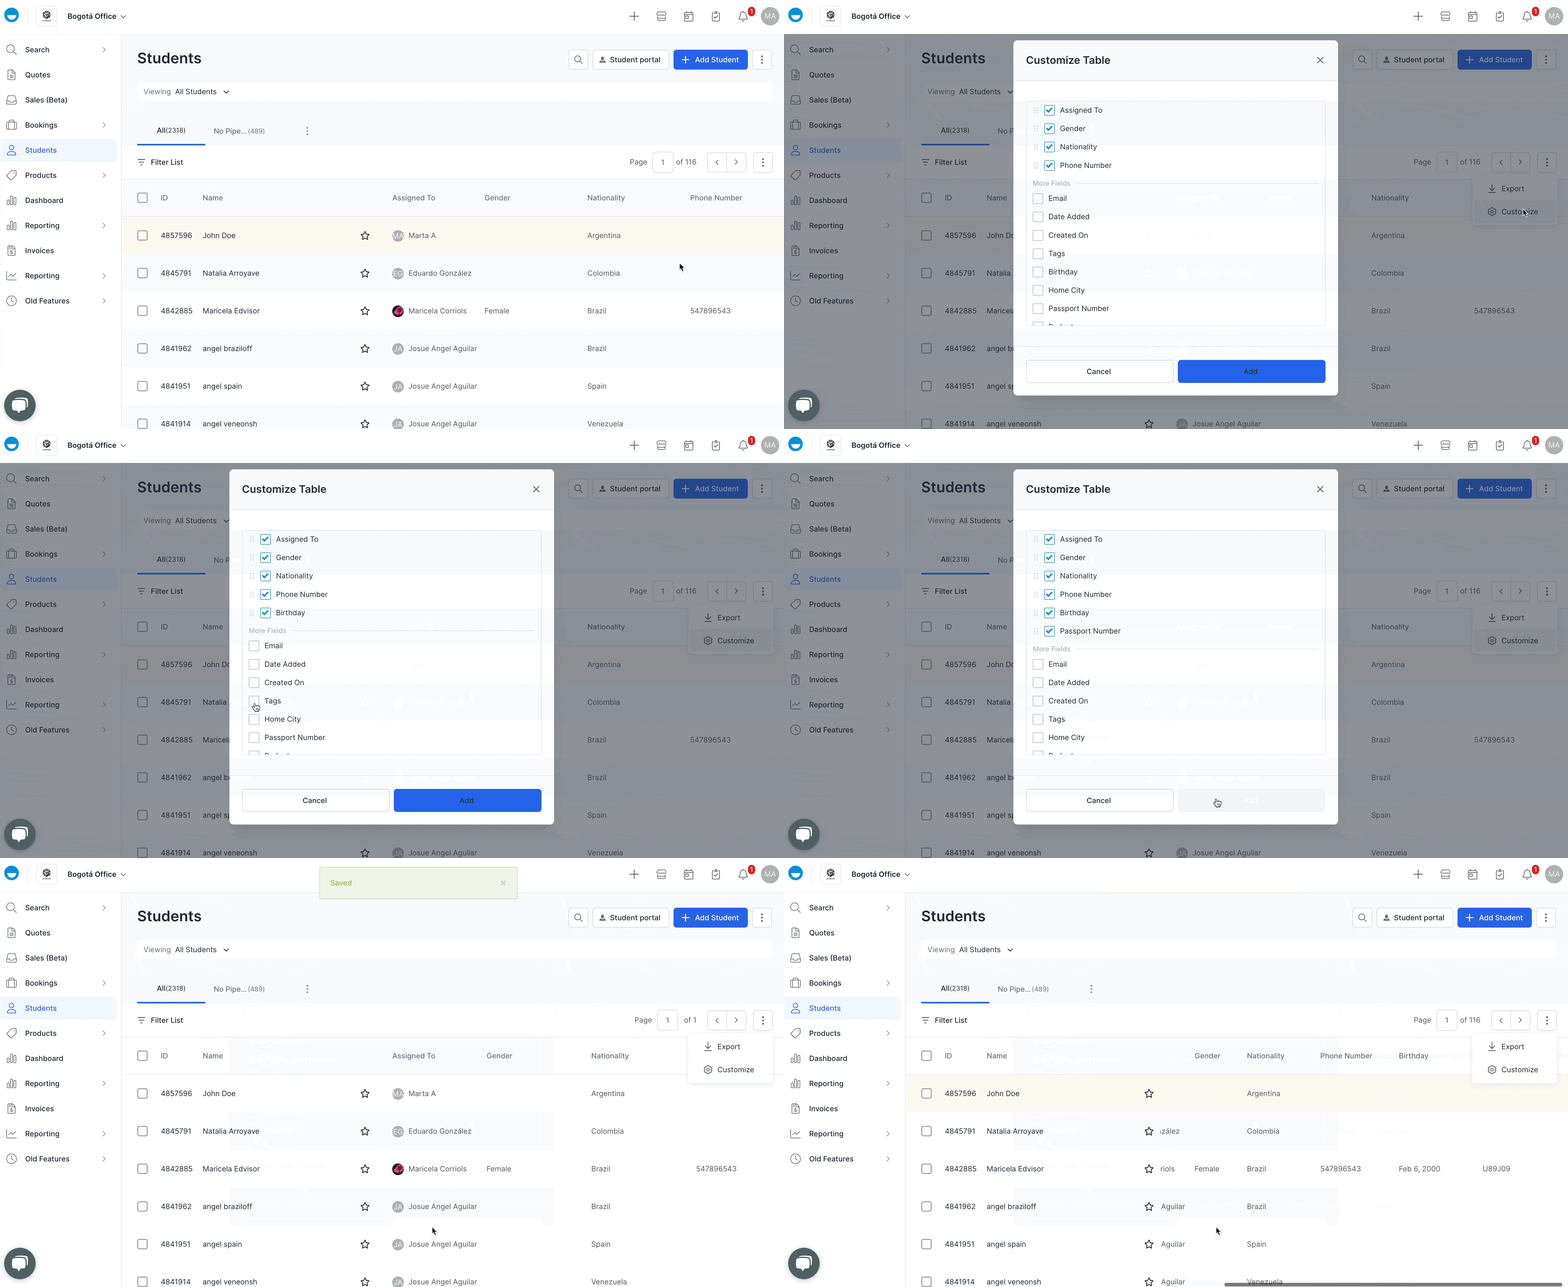
You can customize the information shown in these lists.
- Click the three-dot icon next to the list pagination and select "Customize."
- Choose the information you want to be displayed in the list columns.
- Click on "Add"

ℹ️ This customization is user-specific, so only you will see these changes.
Filter Students
You can easily find the contacts you need by using filters and customize your view to show only the most relevant contacts based on specific criteria, making it quicker and simpler to manage your leads.
- Simply click on "Filter List" and select the fields by which you'd like to set filters. For example, you can filter contacts by counselor, nationality, start dates...

Search for specific Students
Alternatively, you can use the search bar at the top of the screen to look for a specific student by typing their name. 
ℹ️ The search bar looks for all students with that name across your entire database, regardless of the view you've selected.
Managing Students
Create or Import New Students
- Quickly create new students by clicking "+ Add Student" at the top of the screen.
- For a bulk import of students, click the three-dot icon next to "+ Add Student" and select "Import Students." ⚠️ Please note that only Admins are allowed to do this.
Bulk Actions for Managing Students
By clicking the checkbox at the header of each student record, you can apply different actions to multiple students at once.
💡 Tip! If you click on the checkbox in the header, all your students will be selected so you don't need to click one by one.

You can:
- Assign Students to a Counselor: Click the checkbox > Assign > select the counselor who will be in charge of this student/s.
- Delete a Student: Click the checkbox > Delete. This action will delete the selected students and cannot be undone.
- Add Tags to Students: Click the checkbox > Tag > create a new tag or tag your student with any of the existing tags.
- Add or Remove Students from a Pipeline: Click the checkbox > Pipeline > add or remove a student from a pipeline.
💡 These actions can also be done individually from the Student Profile, you can access it by clicking on a student's name.
By efficiently using the Students section in Edvisor, you can streamline your student management process, ensuring all student information is organized and easily accessible.