How to send and request student files
Learn how to manage, share, and request students’ documentation through the Sales section on Edvisor.
With the ‘Sales’ functionality on Edvisor, you and your student can work together to manage all the necessary documentation for their trip. You can share files with your student and request them to upload documents for you.
In this article, we'll show you how to:
- Access the student files section
- Share files with your students.
- Request files from your students.
- Create, manage and use file request templates.
Access files on Edvisor
On Edvisor, student files are managed from the Sales section, to access them, simply follow these steps:
⚠️ If you haven’t created a sale yet, you’ll need to do that first. Go back to this tutorial to learn how.
- Click on ‘Sales’ from the left-side menu of your Edvisor platform.
- Then open a sale by selecting one from the list.
- Once in the sale profile, click on 'Student Files'. 💡This section is designed to help you manage your students' documents with ease.
.png?width=550&height=290&name=KB_Files_3%20(1).png)
How to share files with your students
You can manually add documents to this section, and these documents will be instantly shared with the student through the Student Portal.
You can also request the student to send you a document via the Student Portal.

The student will receive an email inviting them to upload the required document. They'll also get a notification in the Student Portal.
|
This is the email the student notification will receive |
This is how the notification looks like in the Student Portal |
Once the student uploads a document, the counselor will be notified, and the document will be accessible in both the Sale record and the student's profile.
How to Create, Manage and Use File Request Templates
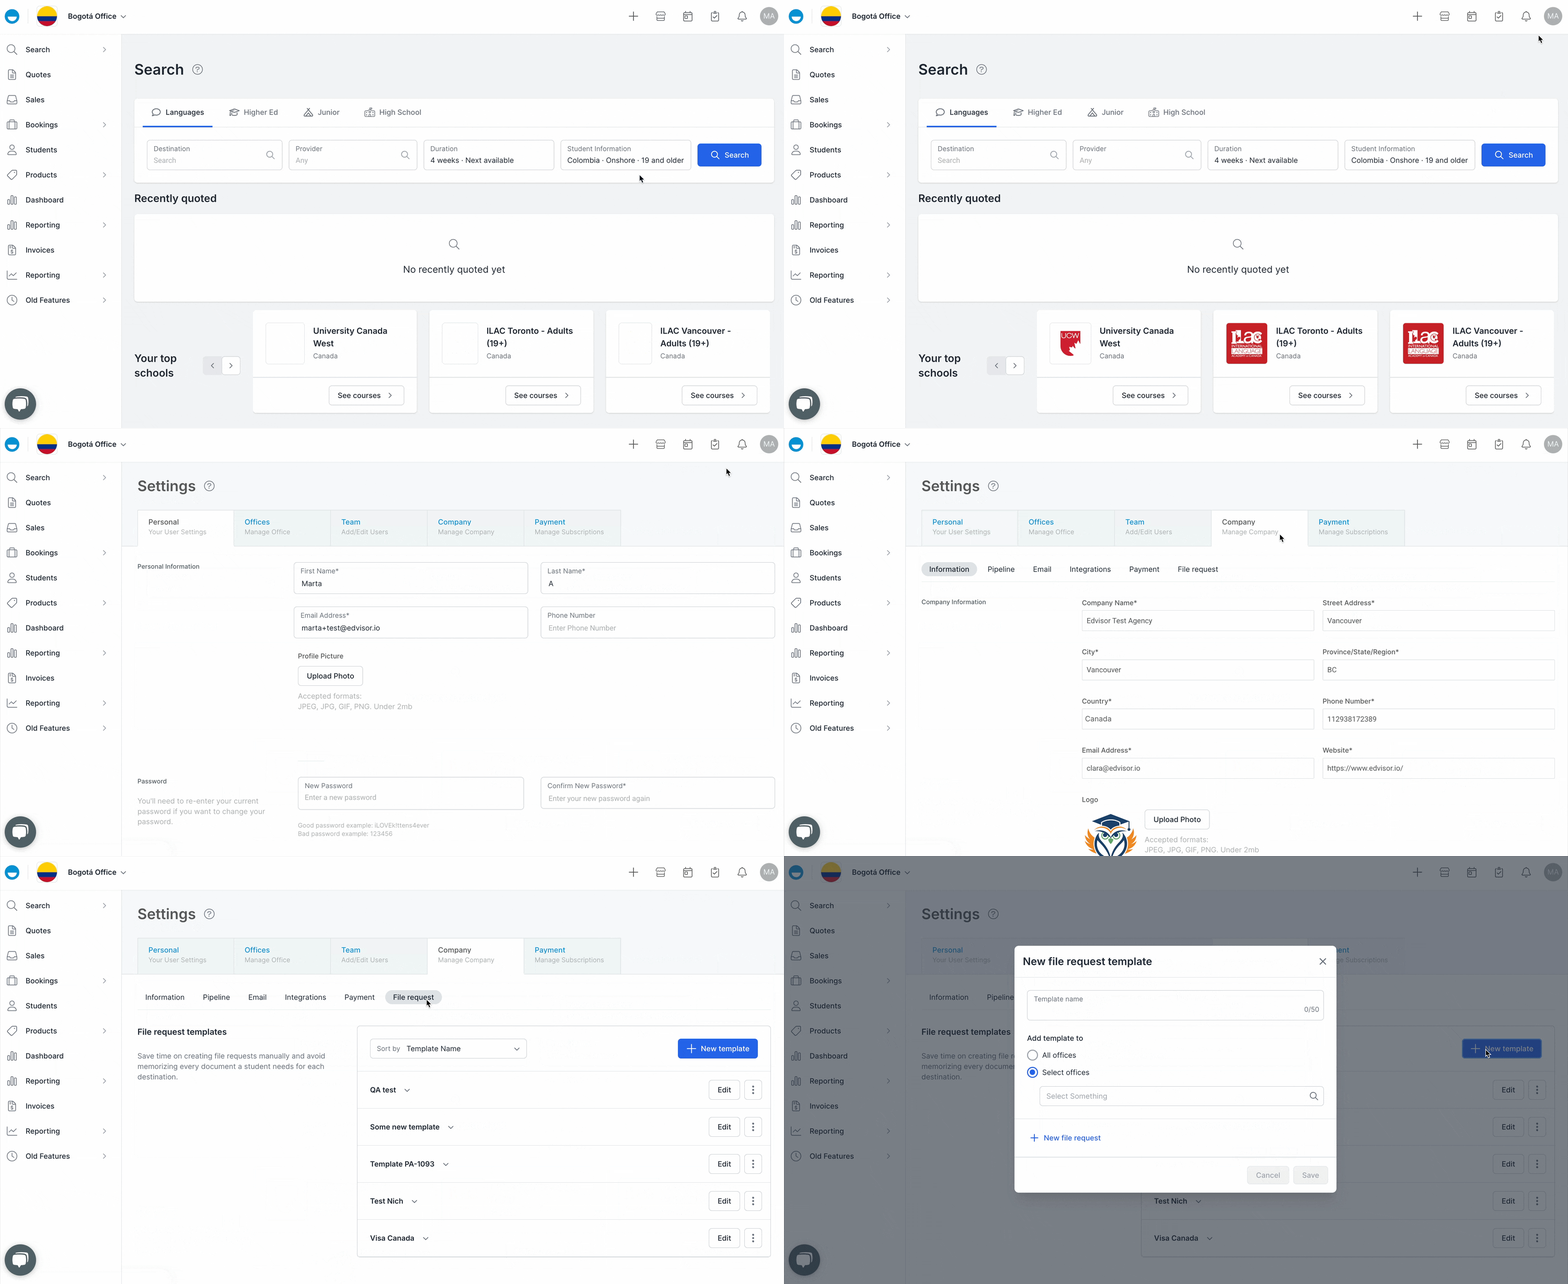
File request templates help you save time by eliminating the need to manually create file requests, or memorize the specific documents required for each student’s destination.
💡 This feature allows you to set up reusable templates for the files you frequently request, making the process faster and more efficient.
Follow the steps below to create, manage, and use file request templates.
🔹 Create your templates:
-
- Head to Settings: Click on your name icon at the top-right corner of the screen, then click
Settings>Company>File Requests. - Create a Template:
- Click on
+New Template Then enter the list of files you commonly request from students based on their destination (e.g., transcripts, recommendation letters, or certificates).- Give the template a clear, descriptive name, such as “Study in Canada Application Files.” .
- Select the offices where you’d like to use this template.
- Click
Save
- Click on
- Head to Settings: Click on your name icon at the top-right corner of the screen, then click

🔹 Use your templates:
-
- Go to
Sales> Open a sale from the list >Student Files>Create File Request>Select Template - Pick your template: Choose a template from the available options. The template will automatically populate the file request form, with the predefined list of files.
- Customize it: If necessary, modify the file list for this specific request by adding or removing items. ⚠️ These changes will not affect the original template, this applies only to the current request.

- Go to
- Edit or Manage your Templates: If you need to tweak a template or delete one that’s outdated, just revisit
Settings>Company>File Requests, select your template, and make your changes for future requests.- ℹ️ You can also delete templates from this section.
Important. Once a file request is created/sent, any changes made to templates will not affect it. Changes to template will only be applied next time you create a new request with this template.
Key takeaways about document handling
- Sales are directly linked to the Student Portal, ensuring that the documents are always in sync with your student—and the other way around.
- Students can monitor all their documents through the files section of their Student Portal. There, they can see both the documents you've uploaded, and any documents they need to upload themselves, with the corresponding due dates.
- All the files you handle within the Sale and Student Portal will also appear in the student's profile, on your Edvisor account.

.jpeg?width=688&height=362&name=KB_Files_1%20(1).jpeg)
.png?width=688&height=362&name=KB_Files_2%20(1).png)