III. New Sales Order

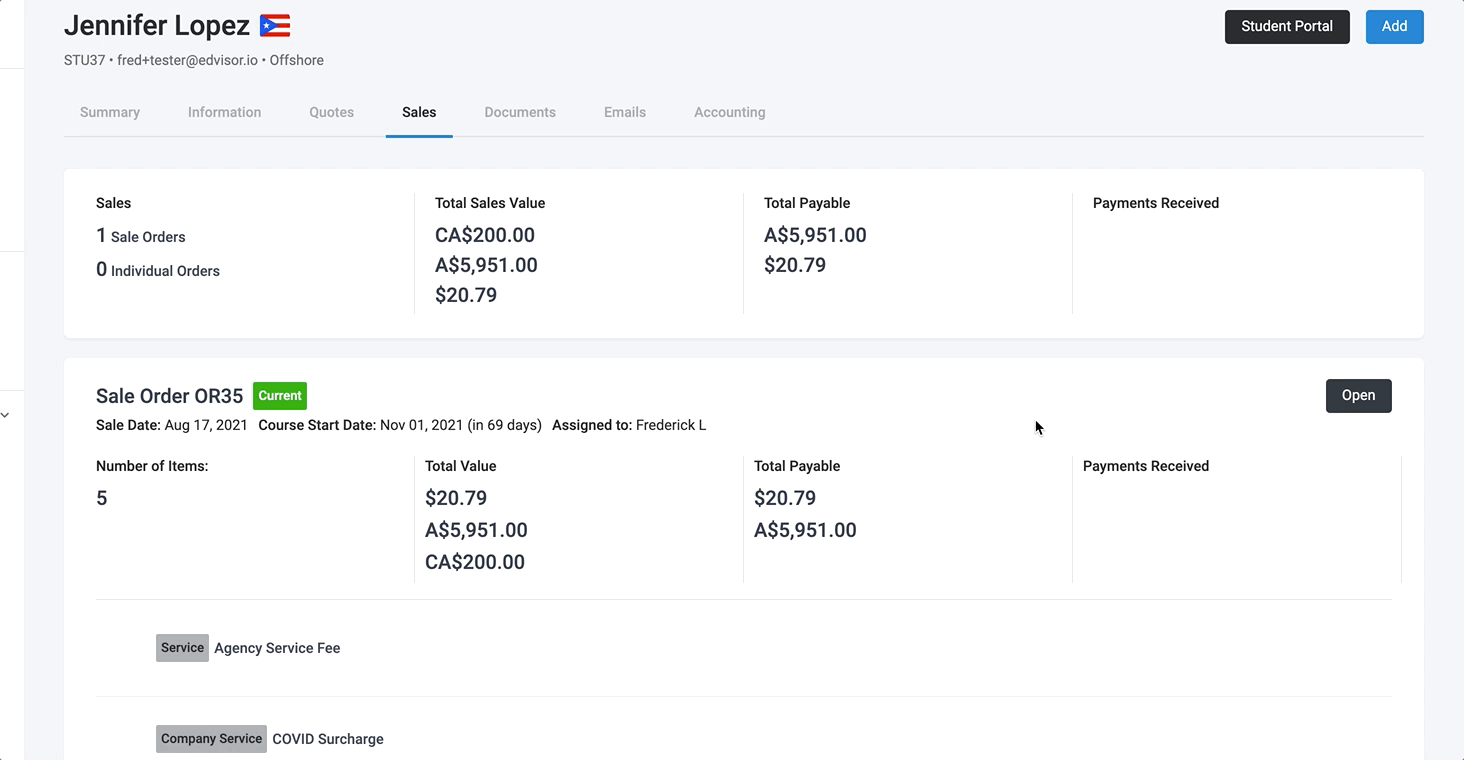
From each Student Profile, you can access any Sales Order (generated from a chosen Quote).
Each Sale Order will contain a number of 'Sale Items' that correspond with each chosen Quote's items - every line item on a quotation will become a Sale Item on Sales Orders.
1. New Sales Order
To accurately track your Sales, you will want to first review your Sales Order, to adjust prices, fees, and add any installments you want to collect from your Student. Reviewing this and making the necessary changes to the Sales Items is important to properly issuing invoices, and recording payments.
Find the corresponding Sale Order ID. Click the 'Open' button to start working with the Sale Order.
For each individual Sale Item, you can:
- Edit the price
- Create installments (to correspond with payments)
- Export as a spreadsheet
- Delete the Item (subtracts the item from the subtotal)
- Cancel the Item (removes the item, without changing the subtotal)
Note: Any changes made to Sale Items after you have already created invoices or recorded payments; will require you to update those associated records, also.
2. Edit a Sale Item
Expand the submenu (three dots) and click on 'Edit'.

A. Begin at the 'Details' tab before moving onto Prices & Fees, and Installments tabs.
B. Set details for duration and dates (sale, start, arrival) about this Sale Item.
C. Custom fields for Sales, created in the 'Company Settings' for Sale Items will now appear here.
D. Assign a counsellor to the Sale Item
3. Edit Price and Fees
Make changes to the total amount on each Sale Item. Goto the 'Prices & fees' tab. You can edit any of the associated fees in the Sales Item, or add new fees as needed.

A. The base fee will appear here (in this example, the tuition fee).
B. Any discounts added will be indicated with a negative symbol
C. Add a new discount or your own custom fees
4. Add Installments
You can then break up your Sale Item totals into installments. Click the 'Installments' tab.

A. Set the number of installments you want.
B. Set the date you want to collect the first payment and the due date intervals of each installment number.
C. Set a currency for this specific Sale Item as well as the rate, as required.
D. If a deposit is required, checking this off will automatically assign the first payment as the deposit (leave the deposit amount field blank)
E. If you add your own deposit amount, be sure to deduct the same deposit amount from another installment you have added.
F. Set the due date of the deposit here.
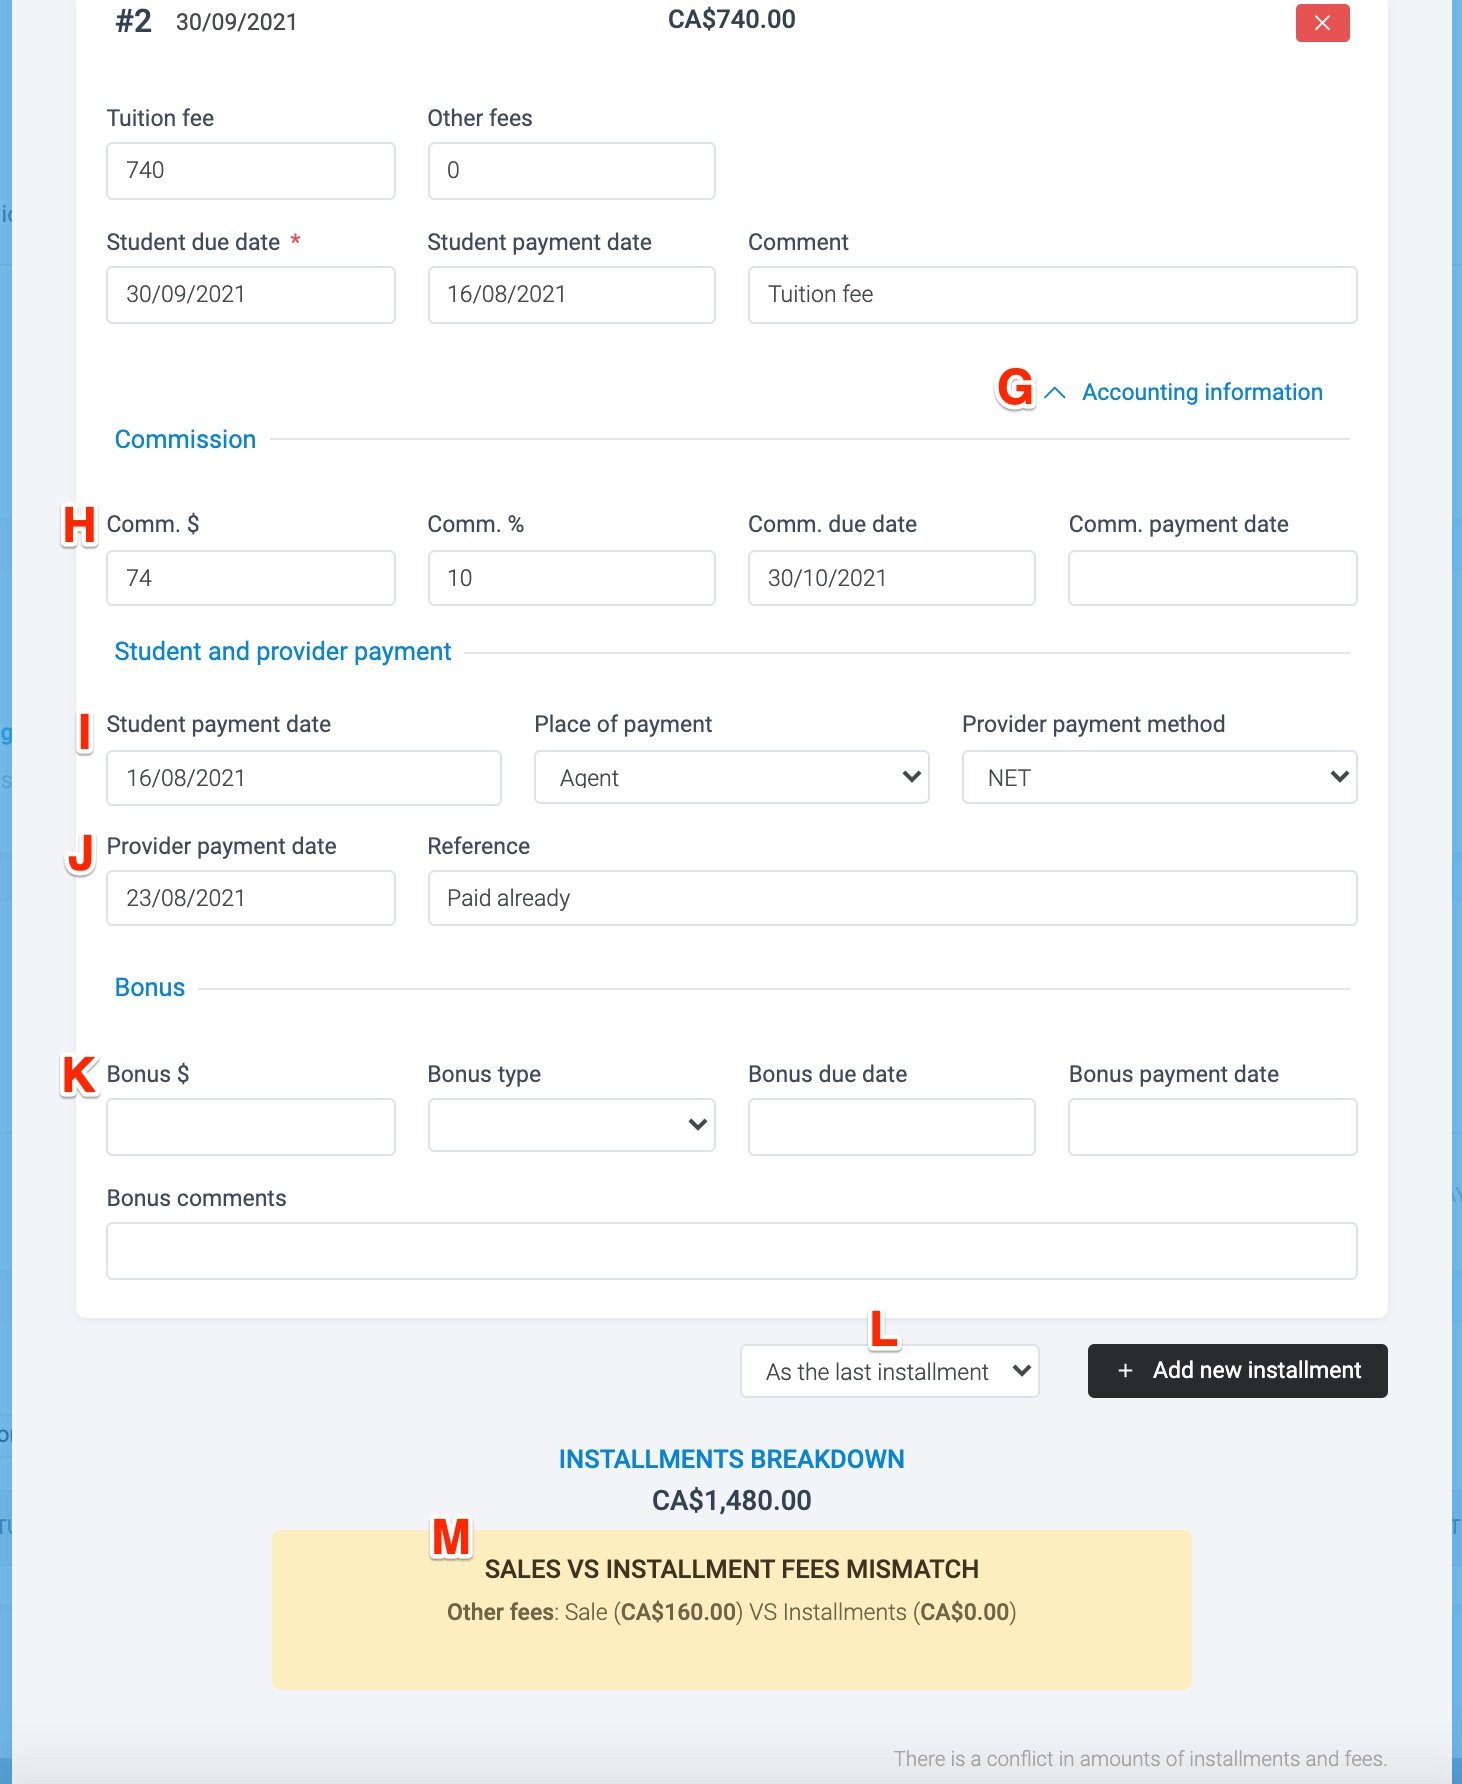
G. If you have a need to allocate payments to the Sale Item immediately (ie. prior payments received. before creating the invoice) , you can do so by expanding the fields - click 'Accounting Information'
H. If this installment you are recording has an associated (provider) commission it will appear here automatically calculated as a dollar amount, based off the percentage. This can be edited if necessary.
I. Record the date of the Student payment, if received. Be sure to indicate NET or Gross payment.
Tip: If you have the option turned on ('Company Settings > Preferences & Misc)', recording student payments will auto-generate a commission invoice that is ready to send to your provider.
J. Record the date of the Providers payment, if the commission has already been received.
K. Add any bonuses to be deducted from the total value of the Sale Item. Amounts here will appear as a negative number.
L. You can add new installment payments manually, and set where you want to position it.
M. If the total amount calculated from all your Sale Item installments do not match the total amount of the Sale Item (determined by the product price and fees), you will see an error message. The amounts must be corrected before you can save and close.
Each single installment created from your entire Sales Order can now be used to generate a new invoice to be sent to your Student or Provider.
IV. Create and Send a Student Invoice
After configuring your Sale Order and Sales Items, begin preparing your invoices to be sent to your Student and Partners.
1. Create a Student Invoice
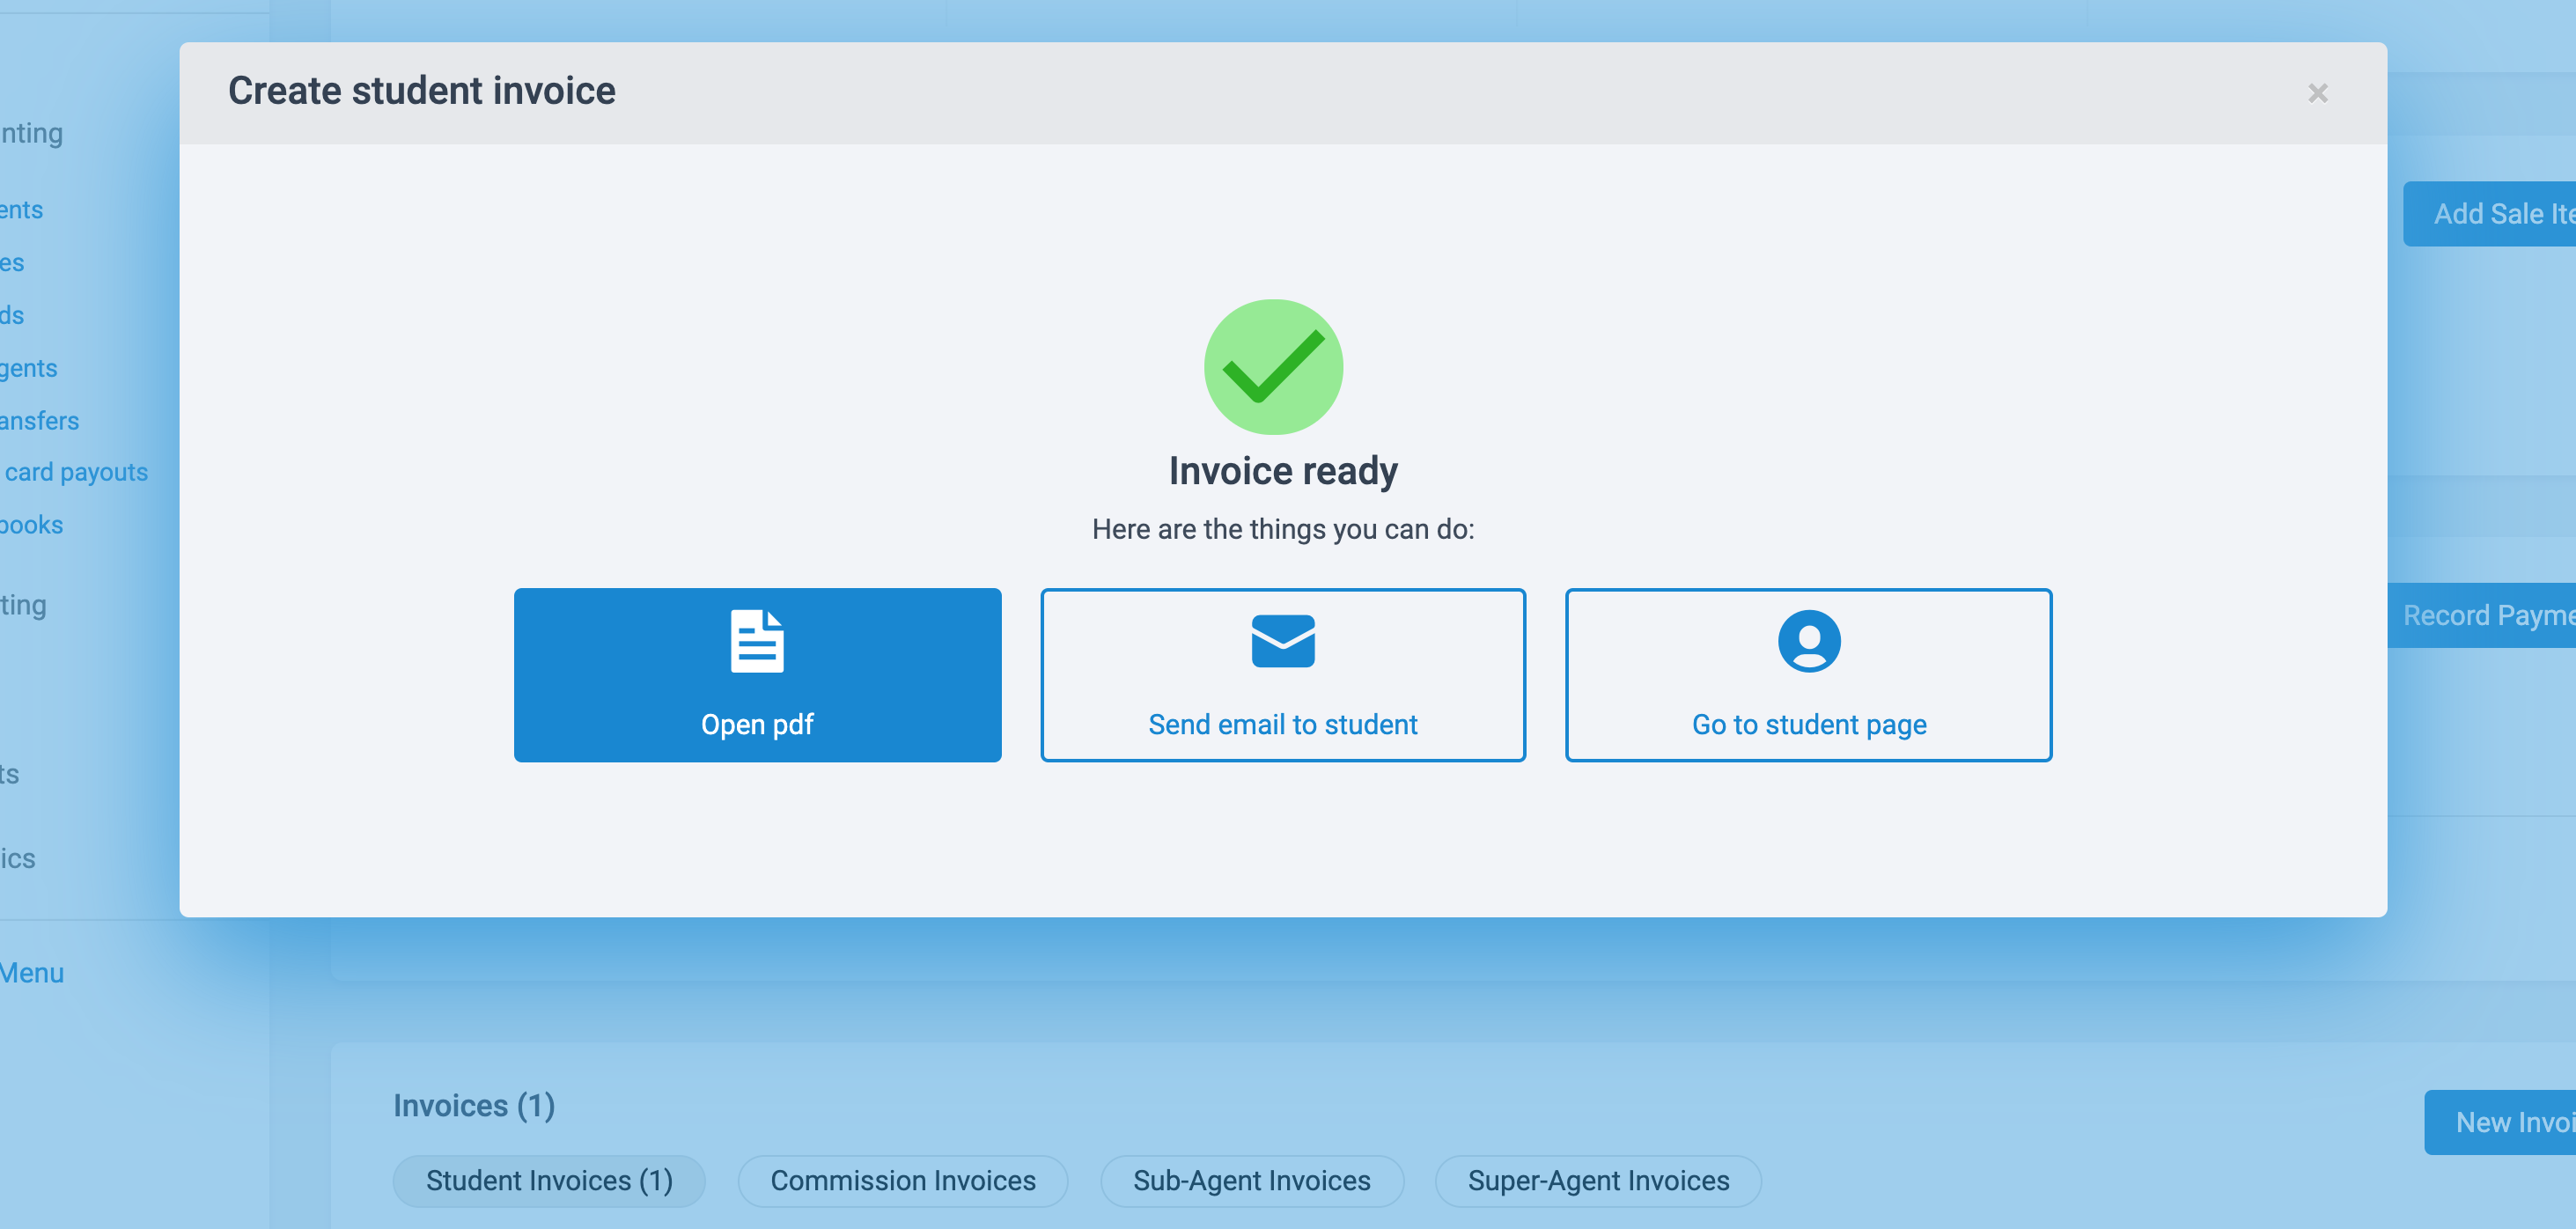
From the Sale Order, goto the Invoice section and click on the 'New Invoice' button:

Select the Items to add to the Student Invoice. You can include as many installment payments as needed. You can also edit the prices, as needed.
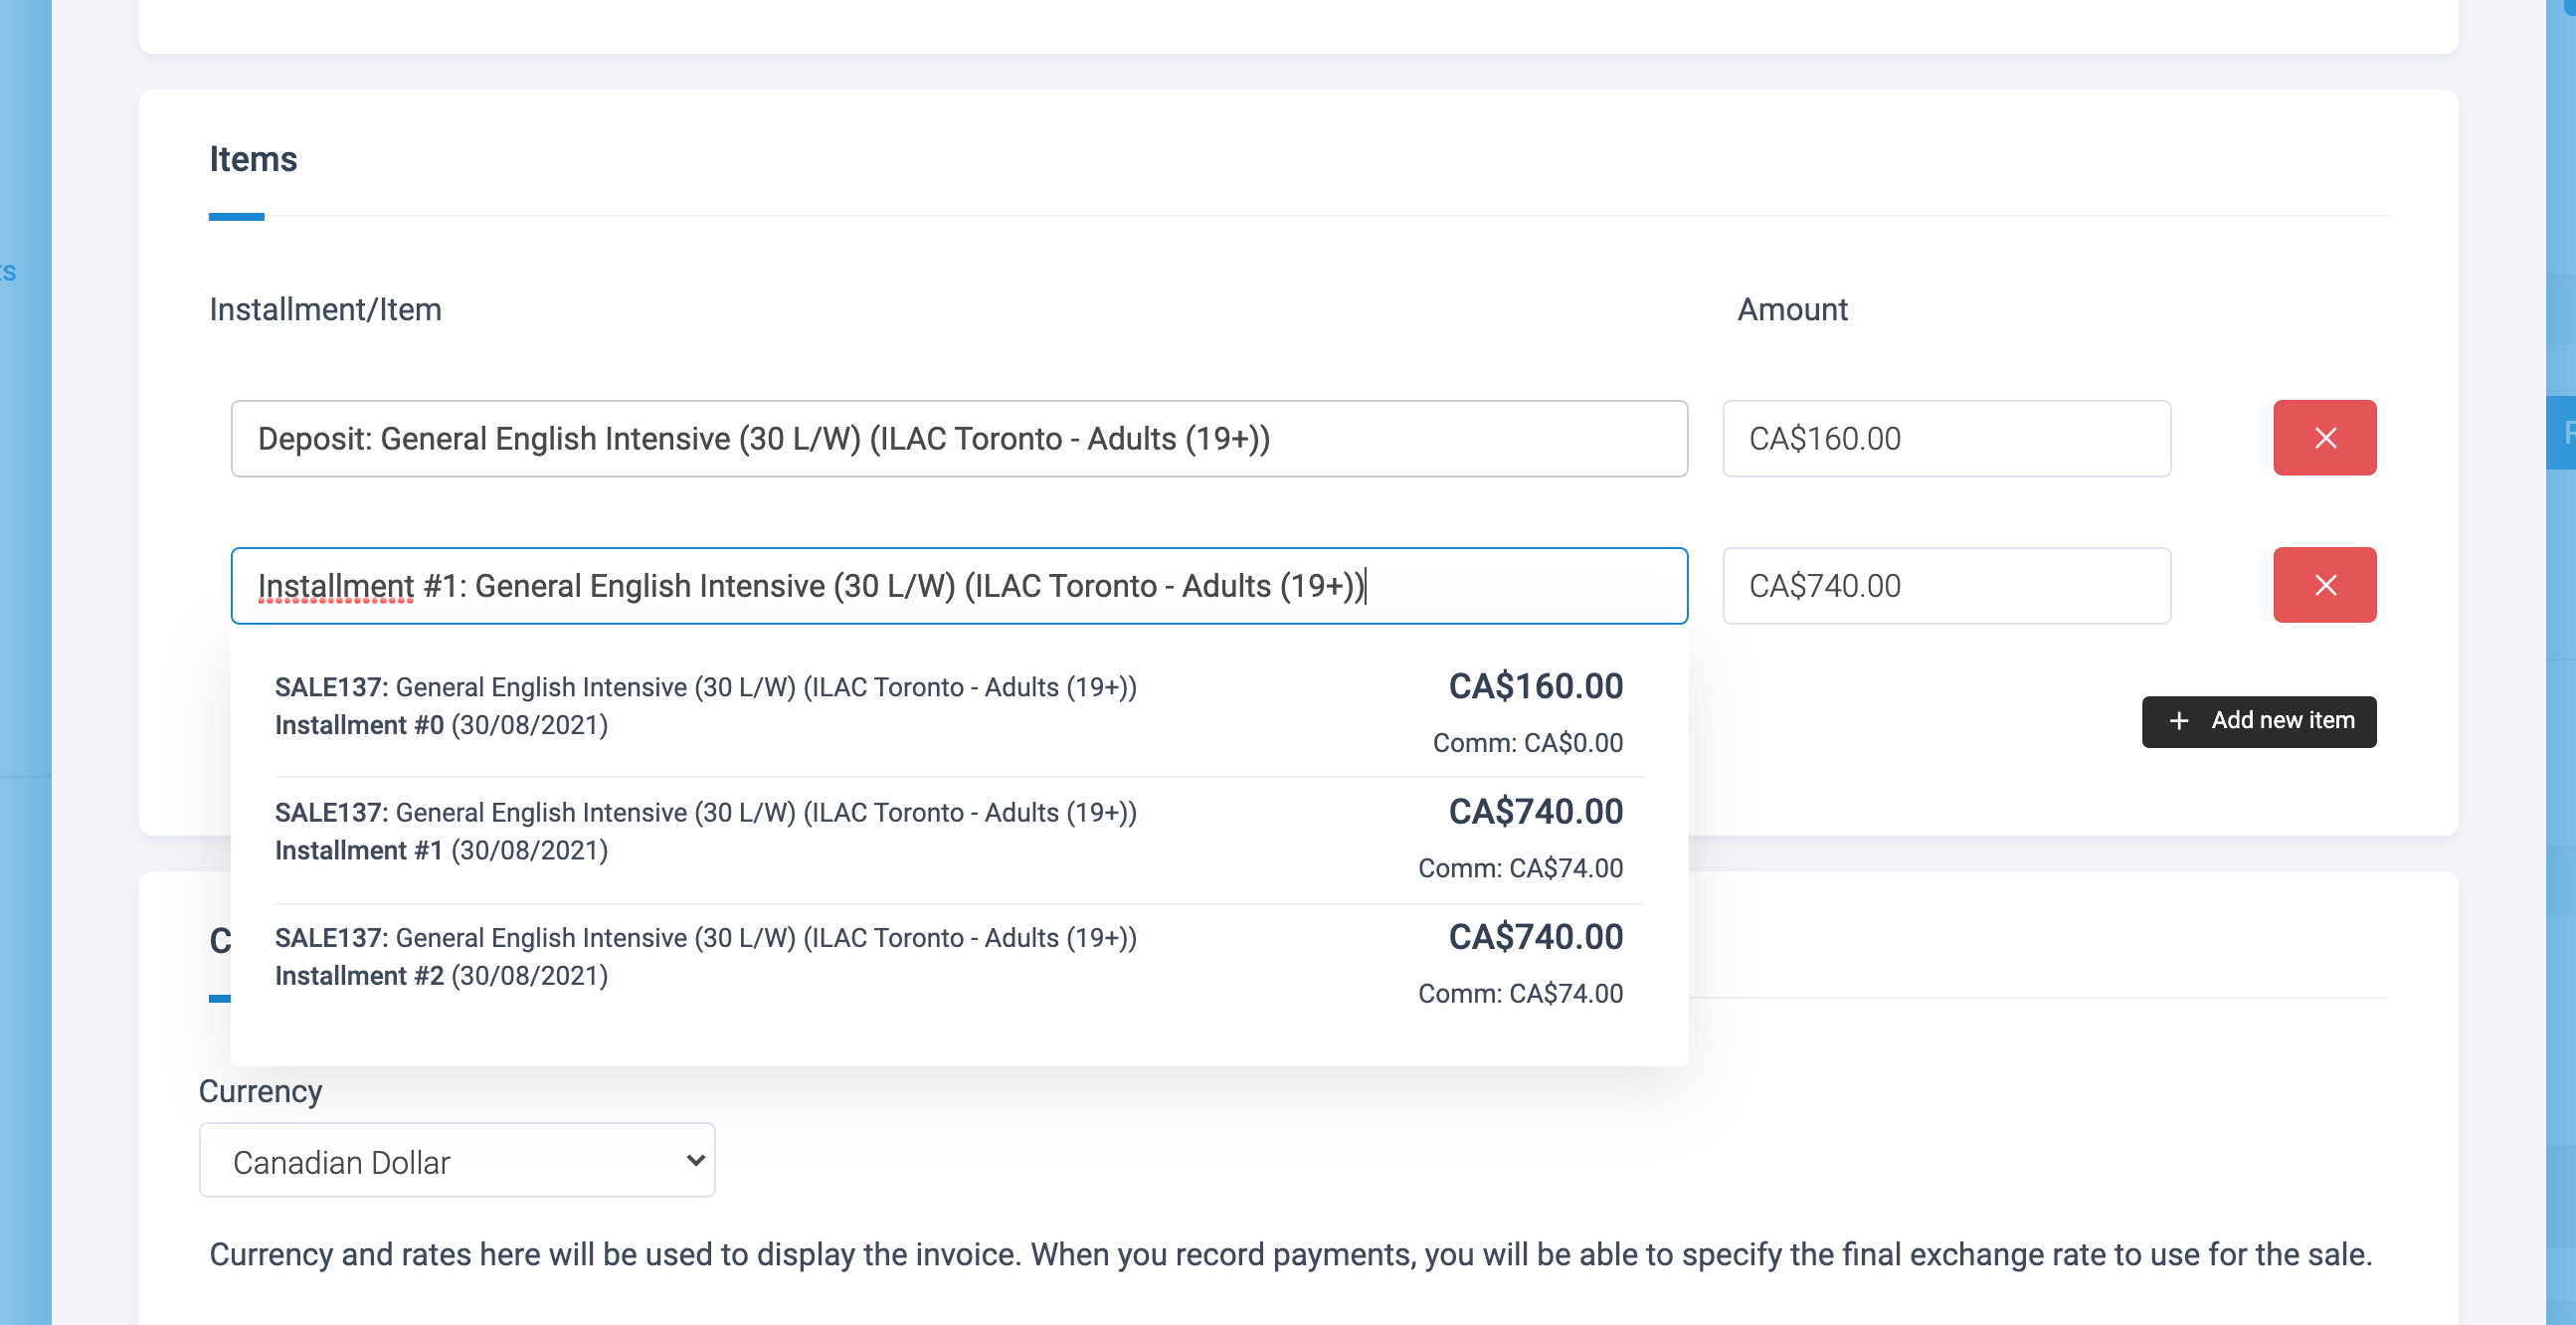
Set the currency and dates for the invoice and click 'Save'.
You'll then be able to pull the pdf, email the invoice, or head back to the Student profile page.
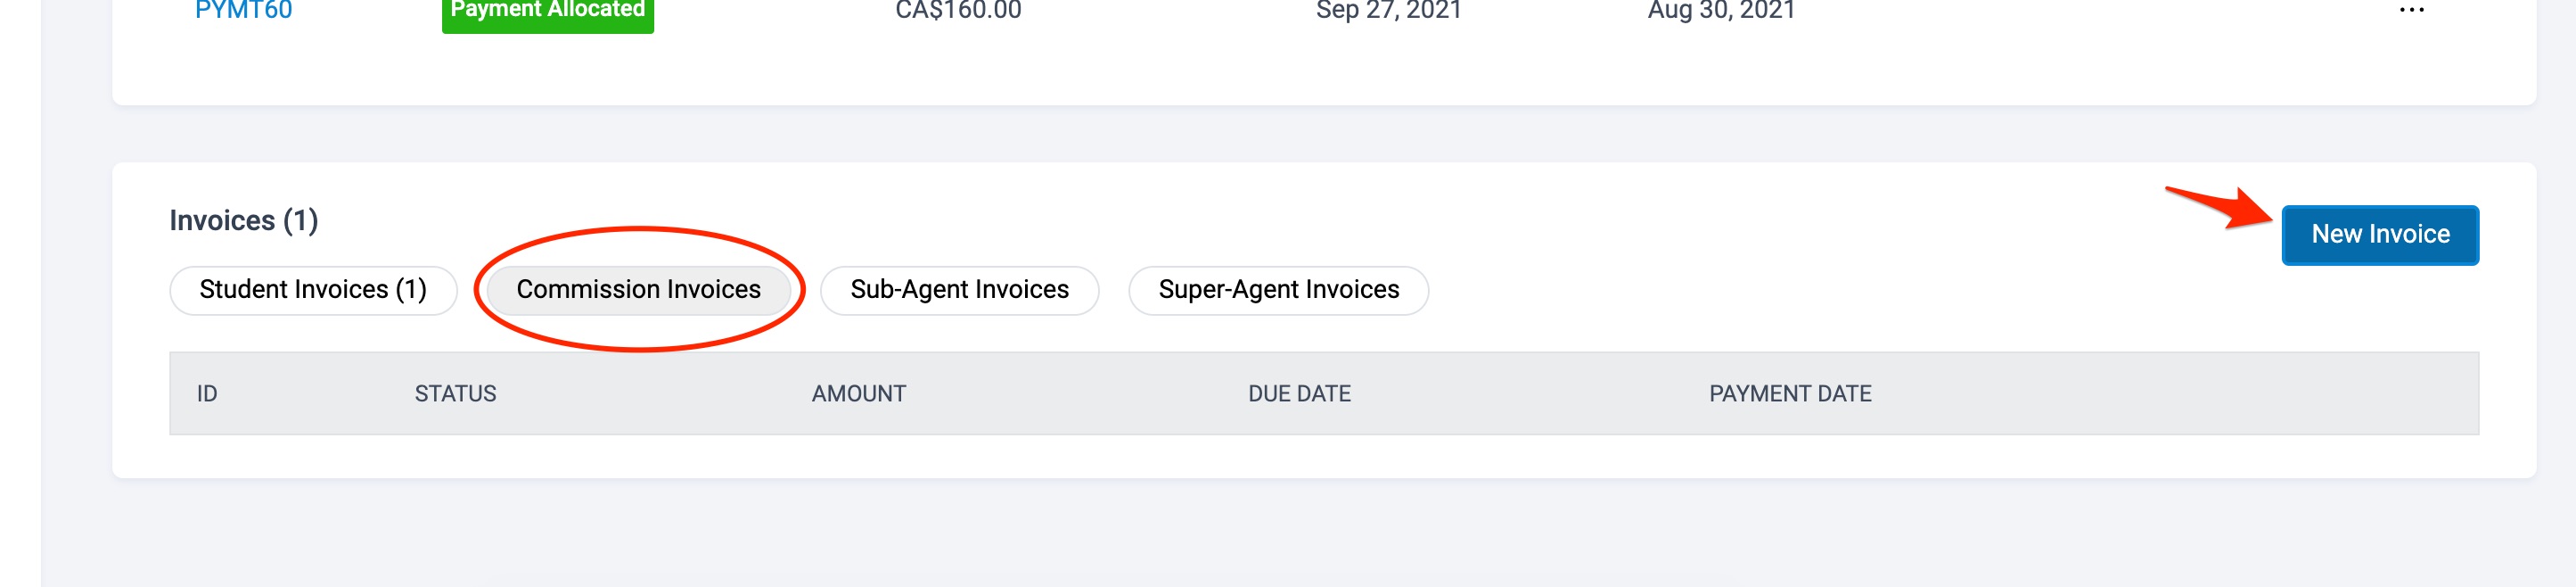
Go back to the Sales Order page and create a 'Commission Invoice'.
2. Create a Commission Invoice
If you have an active agreement with your Provider, commission invoices can be auto-generated when a Student Payment is recorded for applicable items. Turn this feature on, goto 'Company Settings > Preferences & Misc > How Edvisor Recruit works > Invoices'.

However, you do have the option to manually create a Commission Invoice on any installment.
Creating a Commission Invoice is similar to the Student Invoice. Start by selecting 'Commission Invoices' and clicking the 'New Invoice' button:
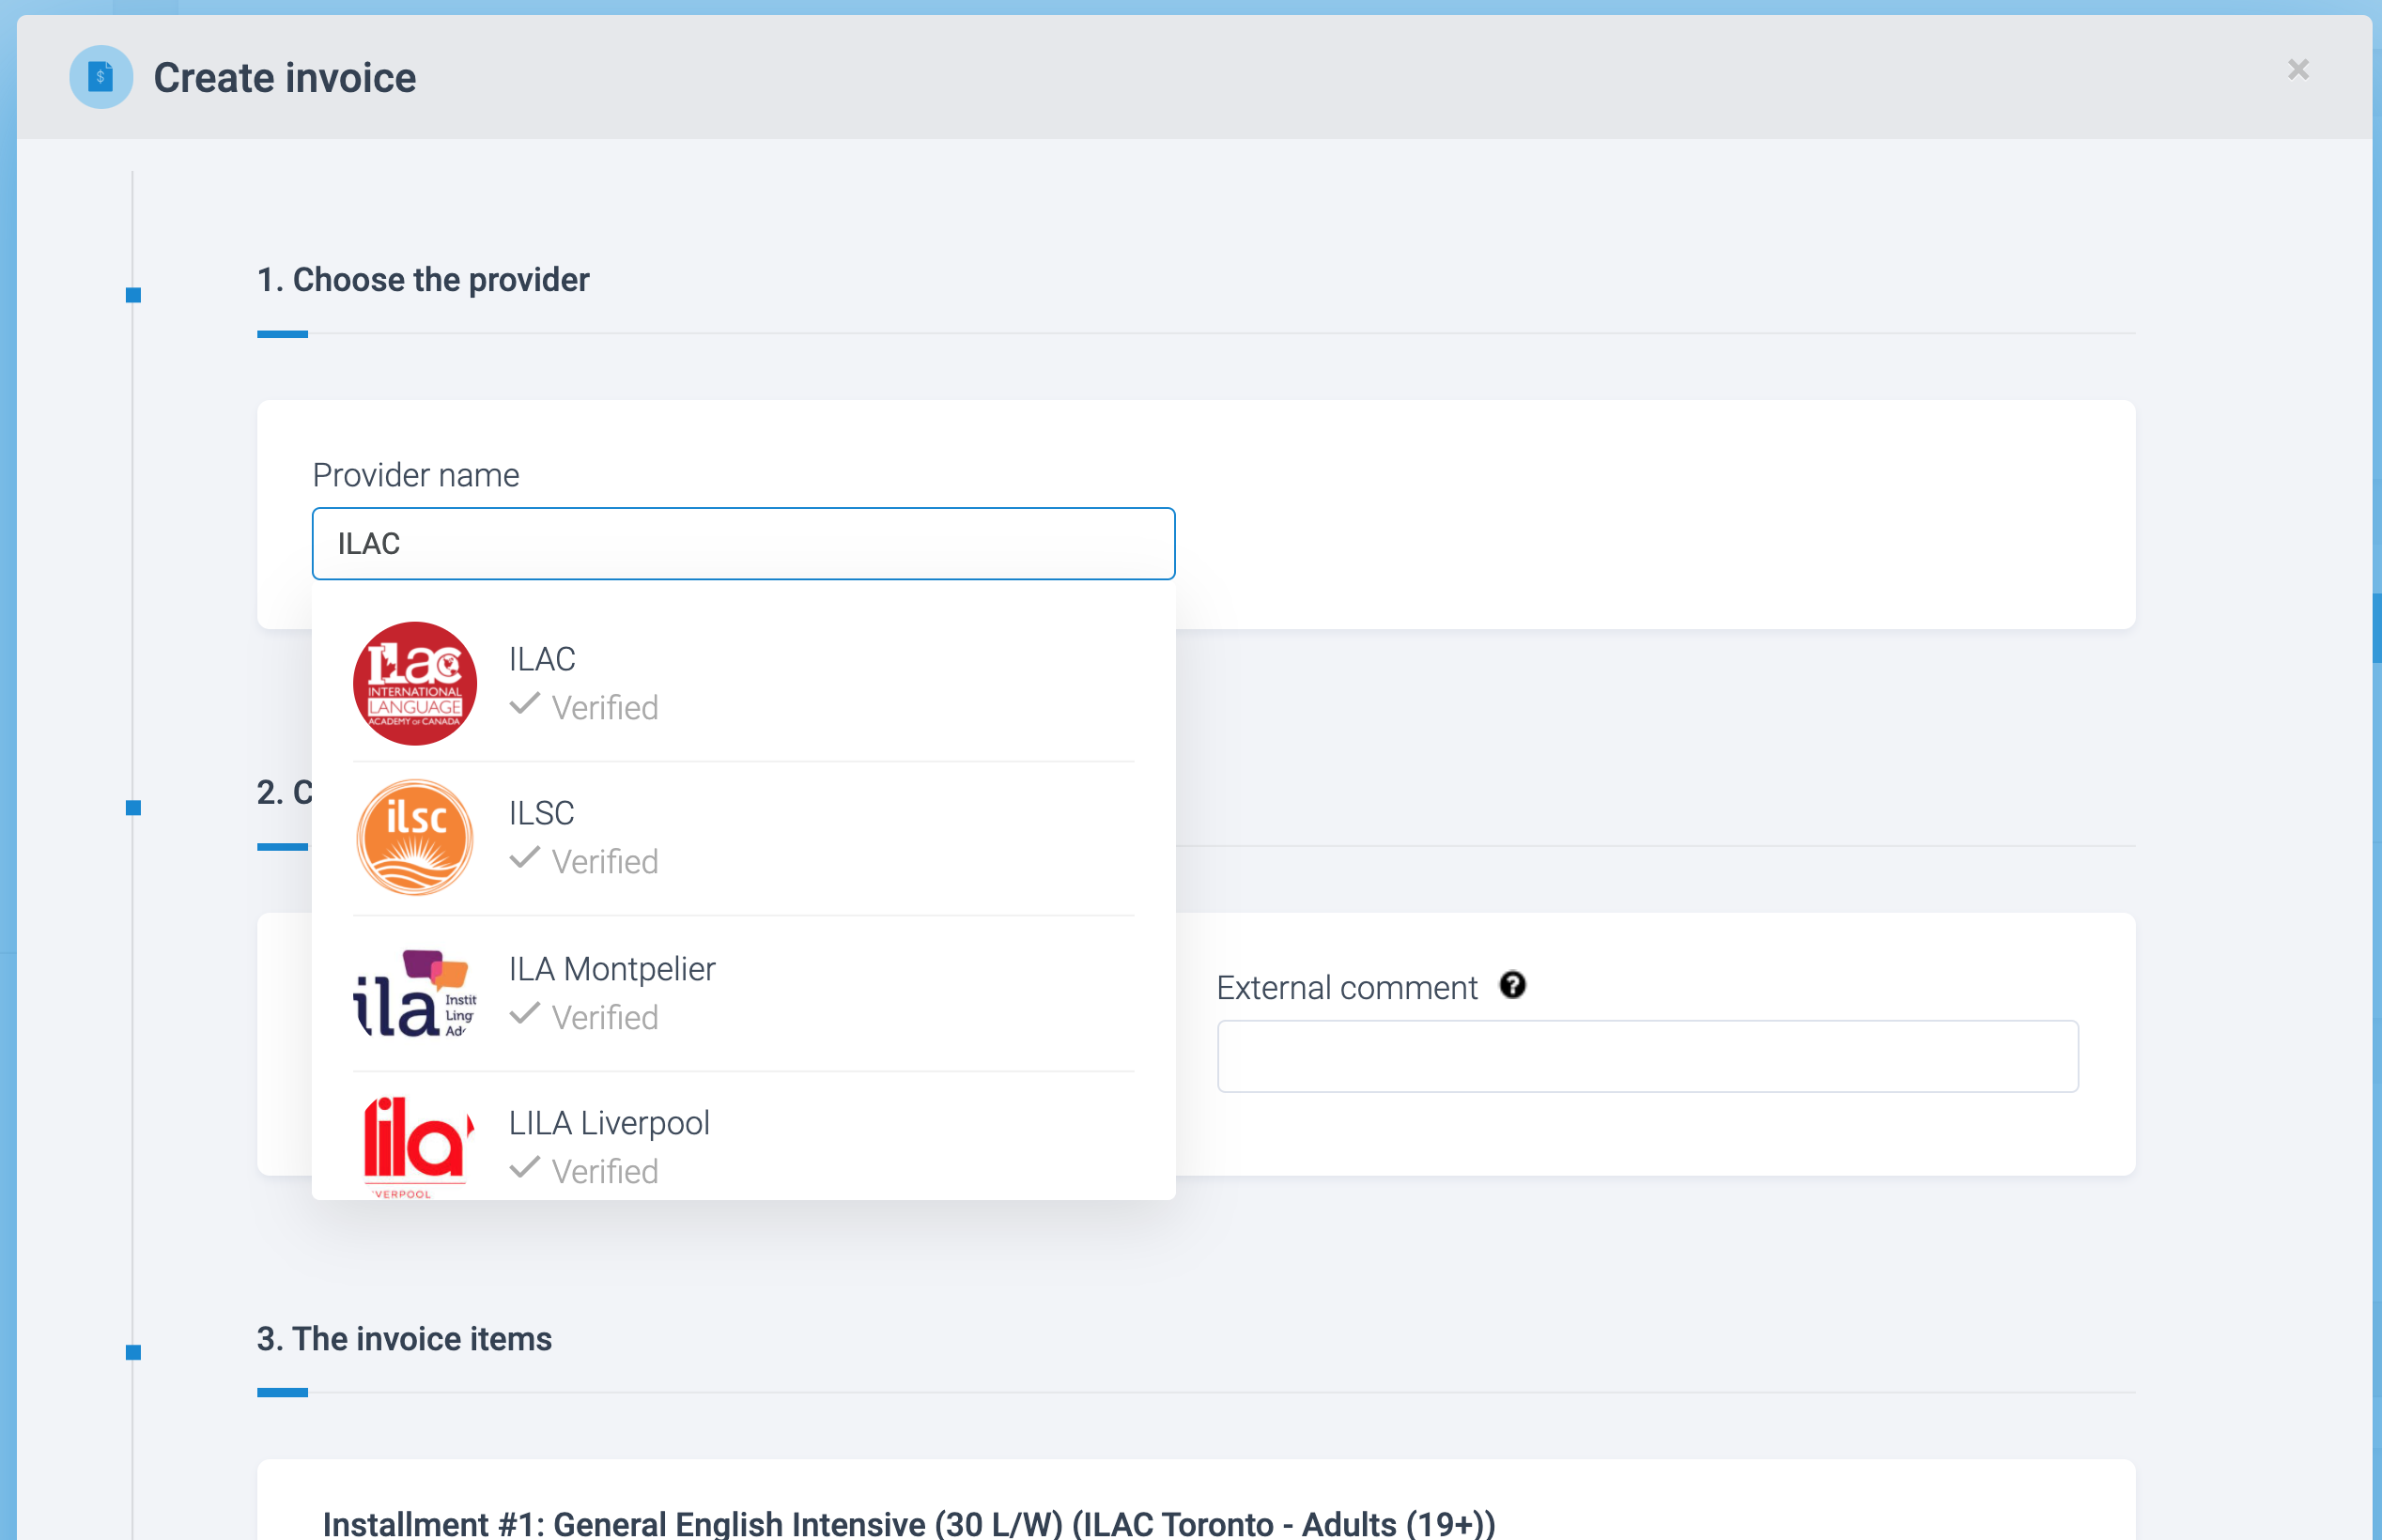
In addition to adding a provider, as opposed to the student, to the invoice, you can set the (exclusive) taxes in Step #4.

The total commission owed is auto-calculated based on the active agreement but can be edited prior to saving (Step #3).

Exactly as with the Student Invoices, the same options are available for Commission Invoices.
3. Go to 'Invoices'
New Invoices created will appear with a 'Draft' status. Mark it as 'Approved' when it is ready to be sent:
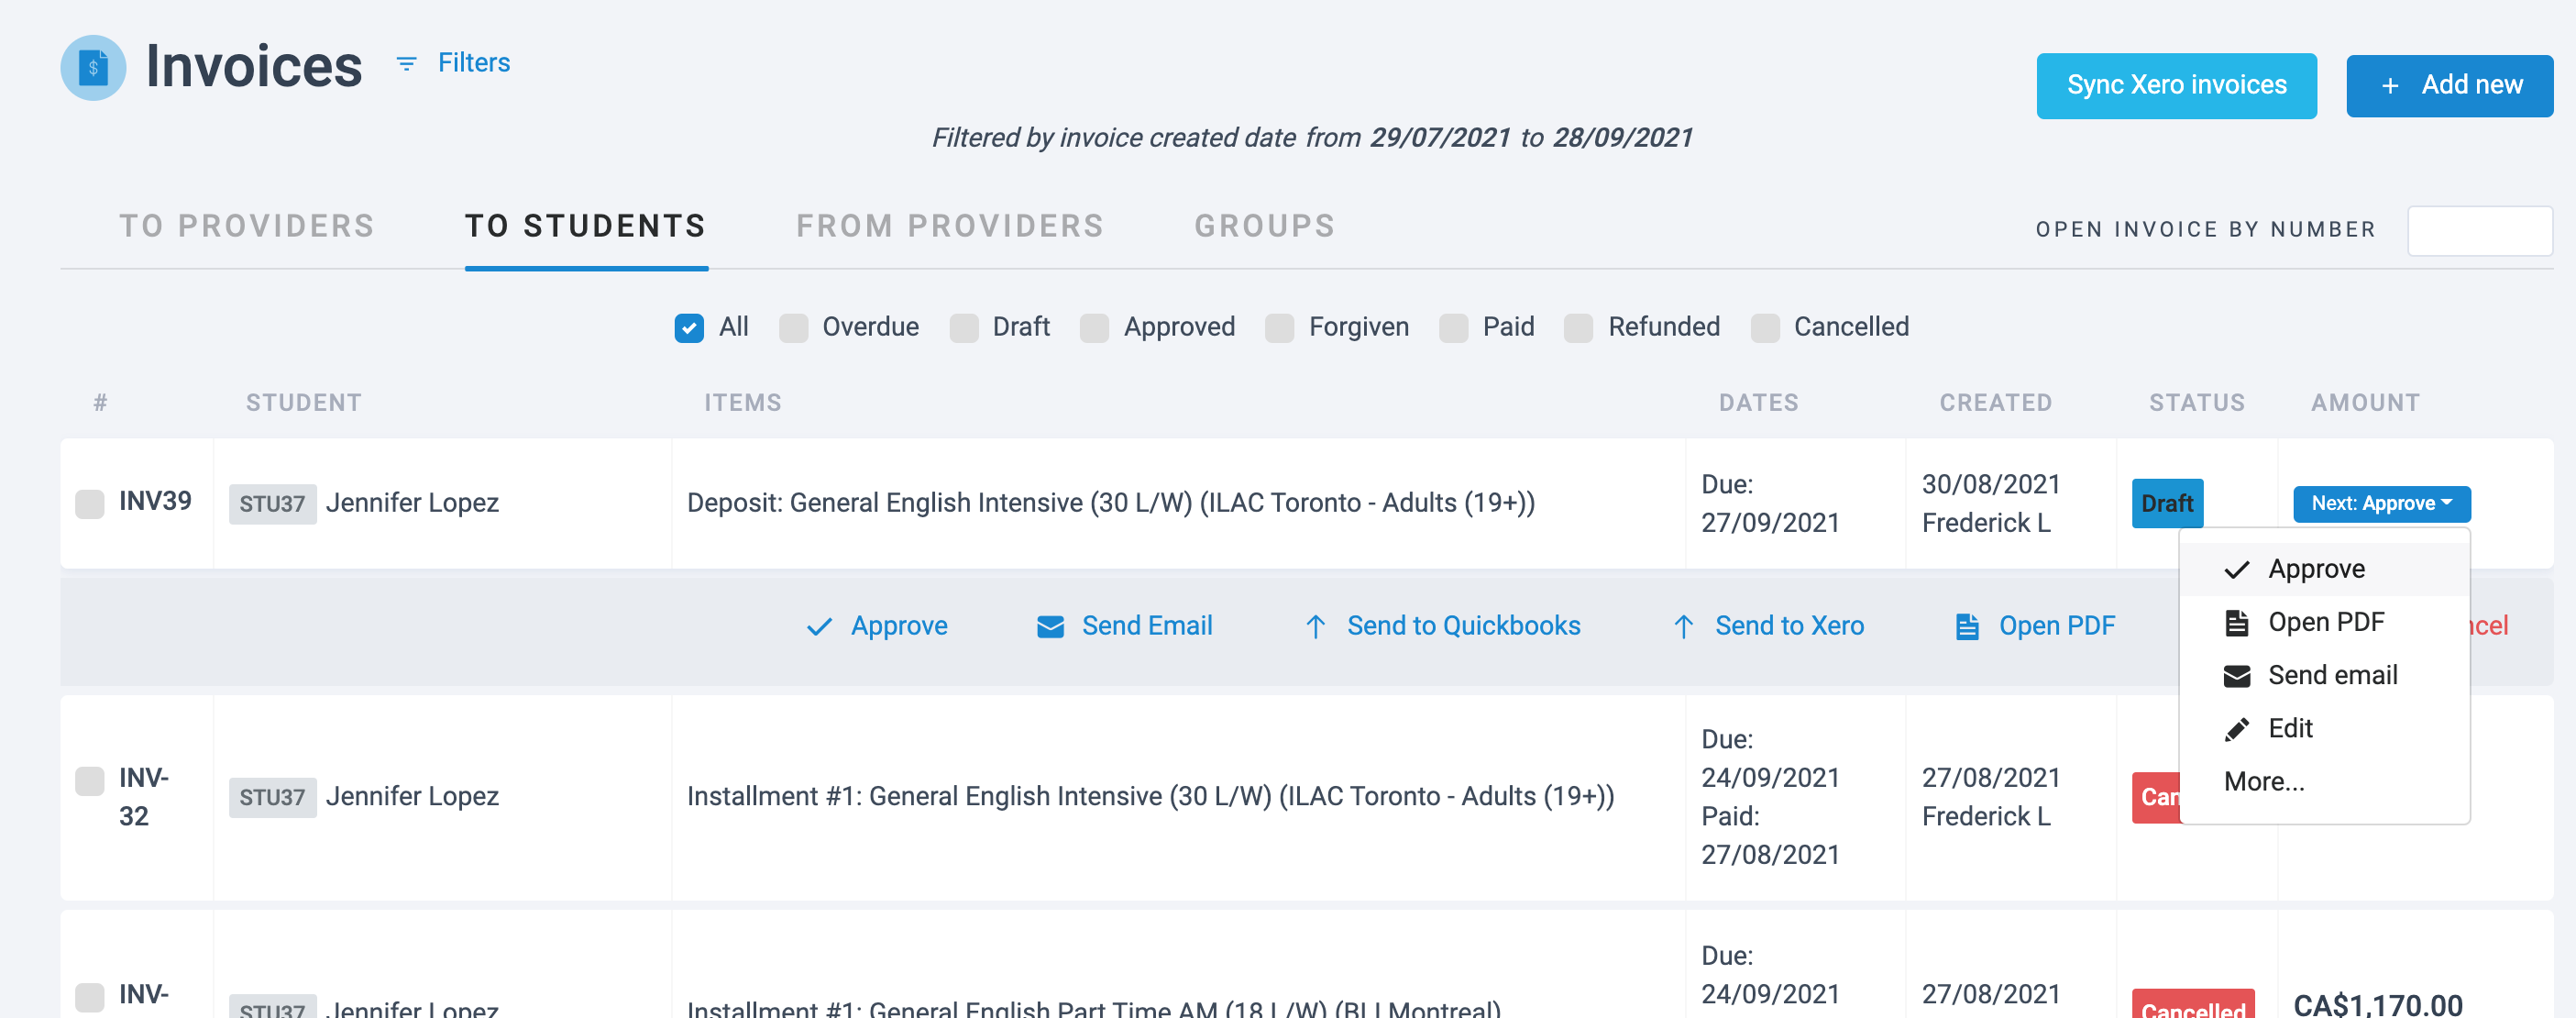
When a payment is received, mark it as 'Paid'':
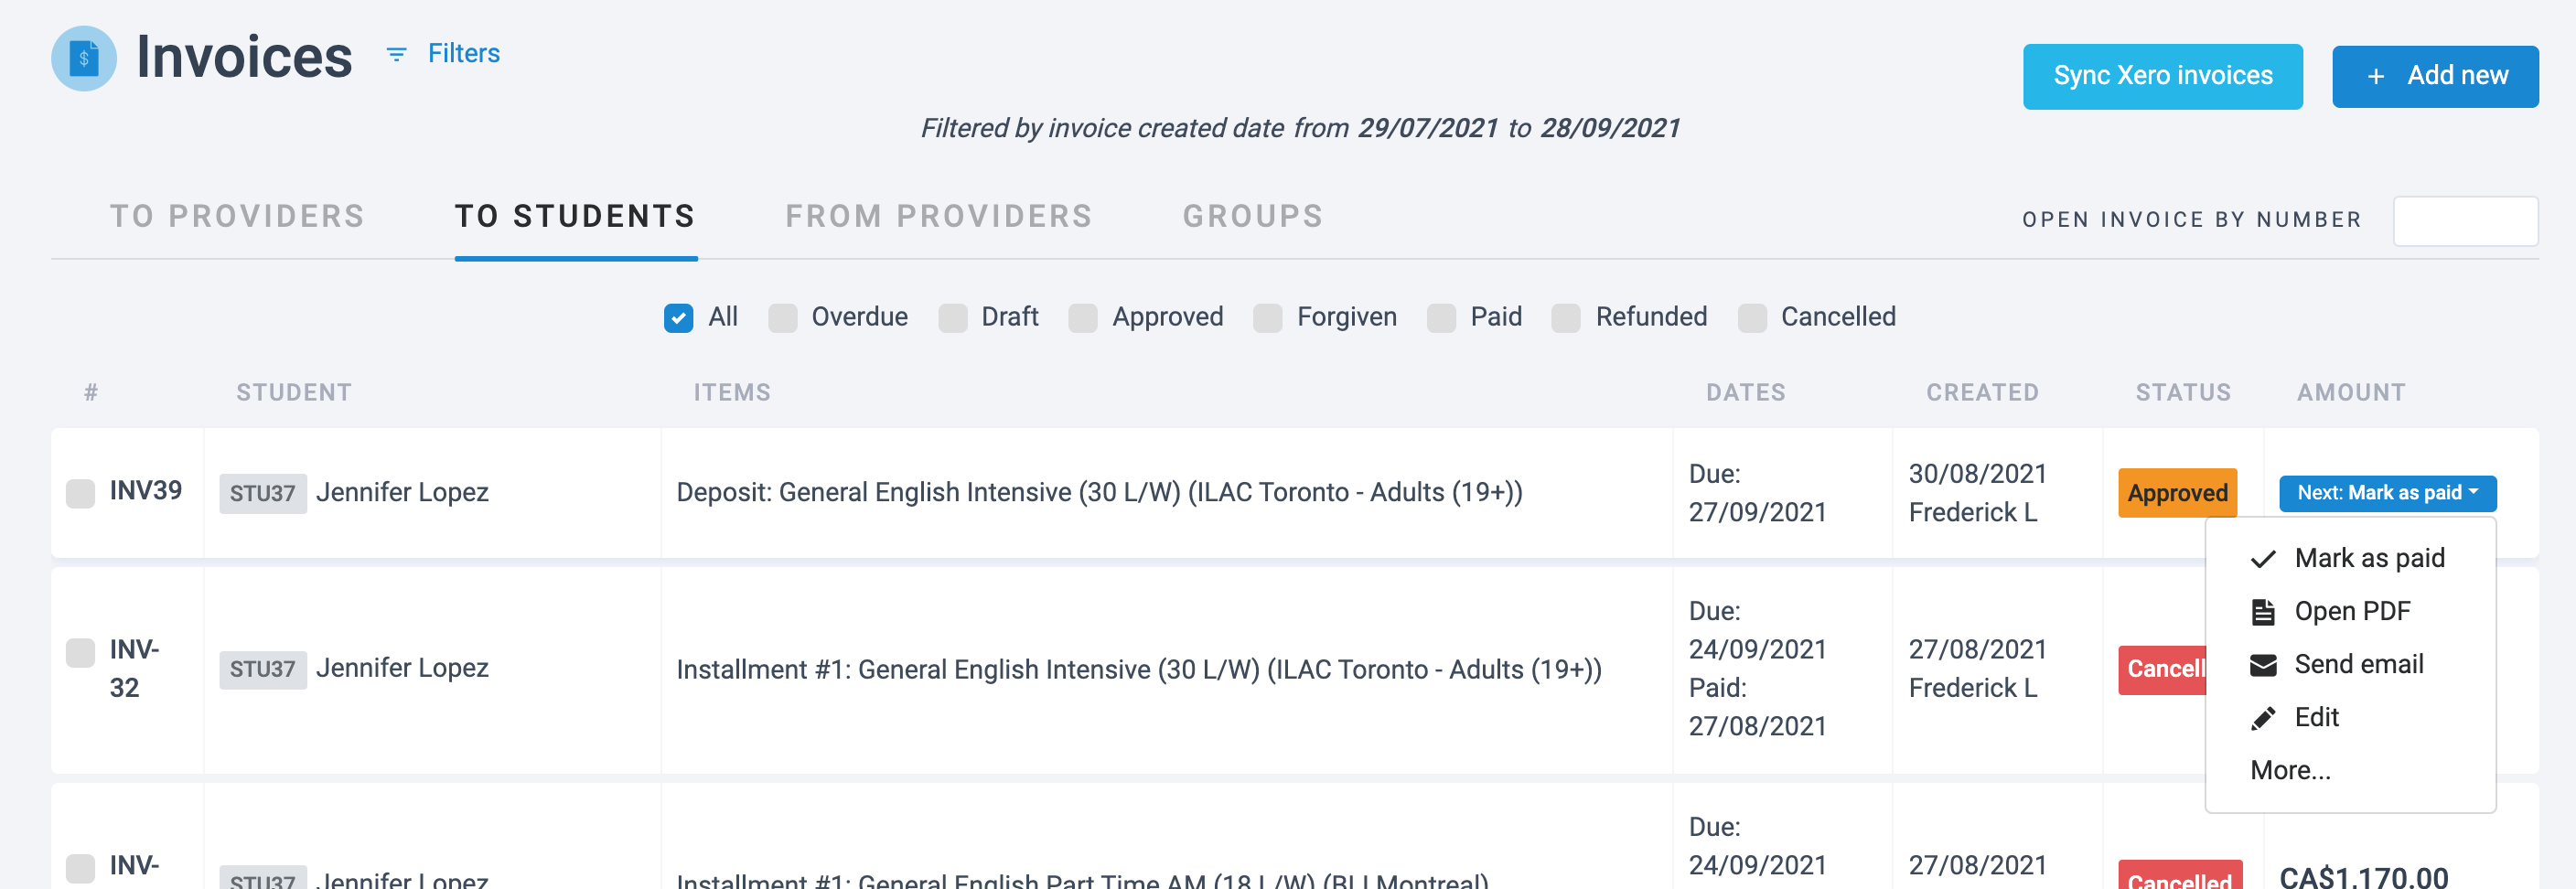
Be sure to use the 'filters' to find the invoice that you are trying to view.
Marking any Invoice as 'Paid' will automatically record a new Payment record associated with the total amount of the invoice. The payment will also be fully 'allocated' to the particular items/installments on the invoice.
Note: Synchronize invoices at any time and send them to Xero or Quickbooks by activating the Add Ons.
V. Requesting and Recording Student Payments (Non-Invoice)
It is possible to record any payment amount manually, without the need for issuing an invoice.
1. Create a new Payment
In the Sale Order, go to the Payment section and click on 'Record Payment' to begin:

A. If needed, change the student you want to record the payment for.
B. Indicate where the student payment went to, and how it was paid.
C. Record the date of the payment.
D. You can use this feature to pull in an amount calculated from your open installments (that have not yet been fully allocated with payments).
E. Select the specific installment(s) to pull the amount from; you can select more than one installment to pull the total amount you want to record.
Once the payment is added, you will need to allocate the amount to one or several Sale Items and its corresponding installments, either partially or fully.
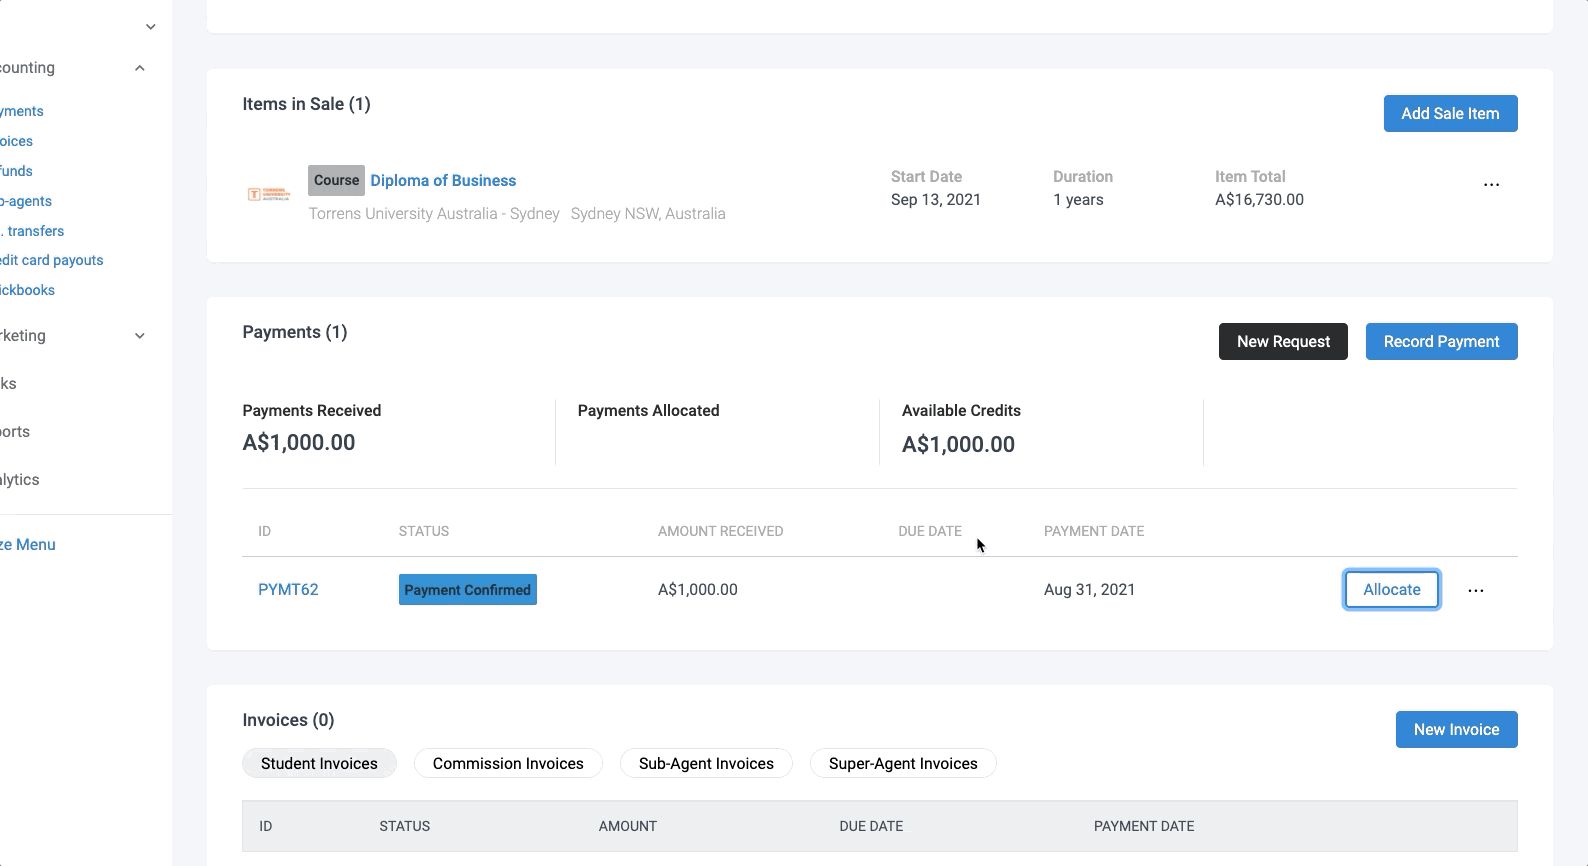
Allocated payments cannot be edited. Only fully allocated installment payments are considered when calculating the outstanding balance. This is the main reason why it is important to arrange your Sale Item installments, prior to recording any payments.