How to add EdCommerce to your WordPress website
Discover how easy it is to integrate your EdCommerce landing page into your WordPress website.
Please be aware that the following instructions are specifically designed for users who utilize WordPress as their website builder. If you are using a different platform or website builder, these steps may not be applicable.
Step 1
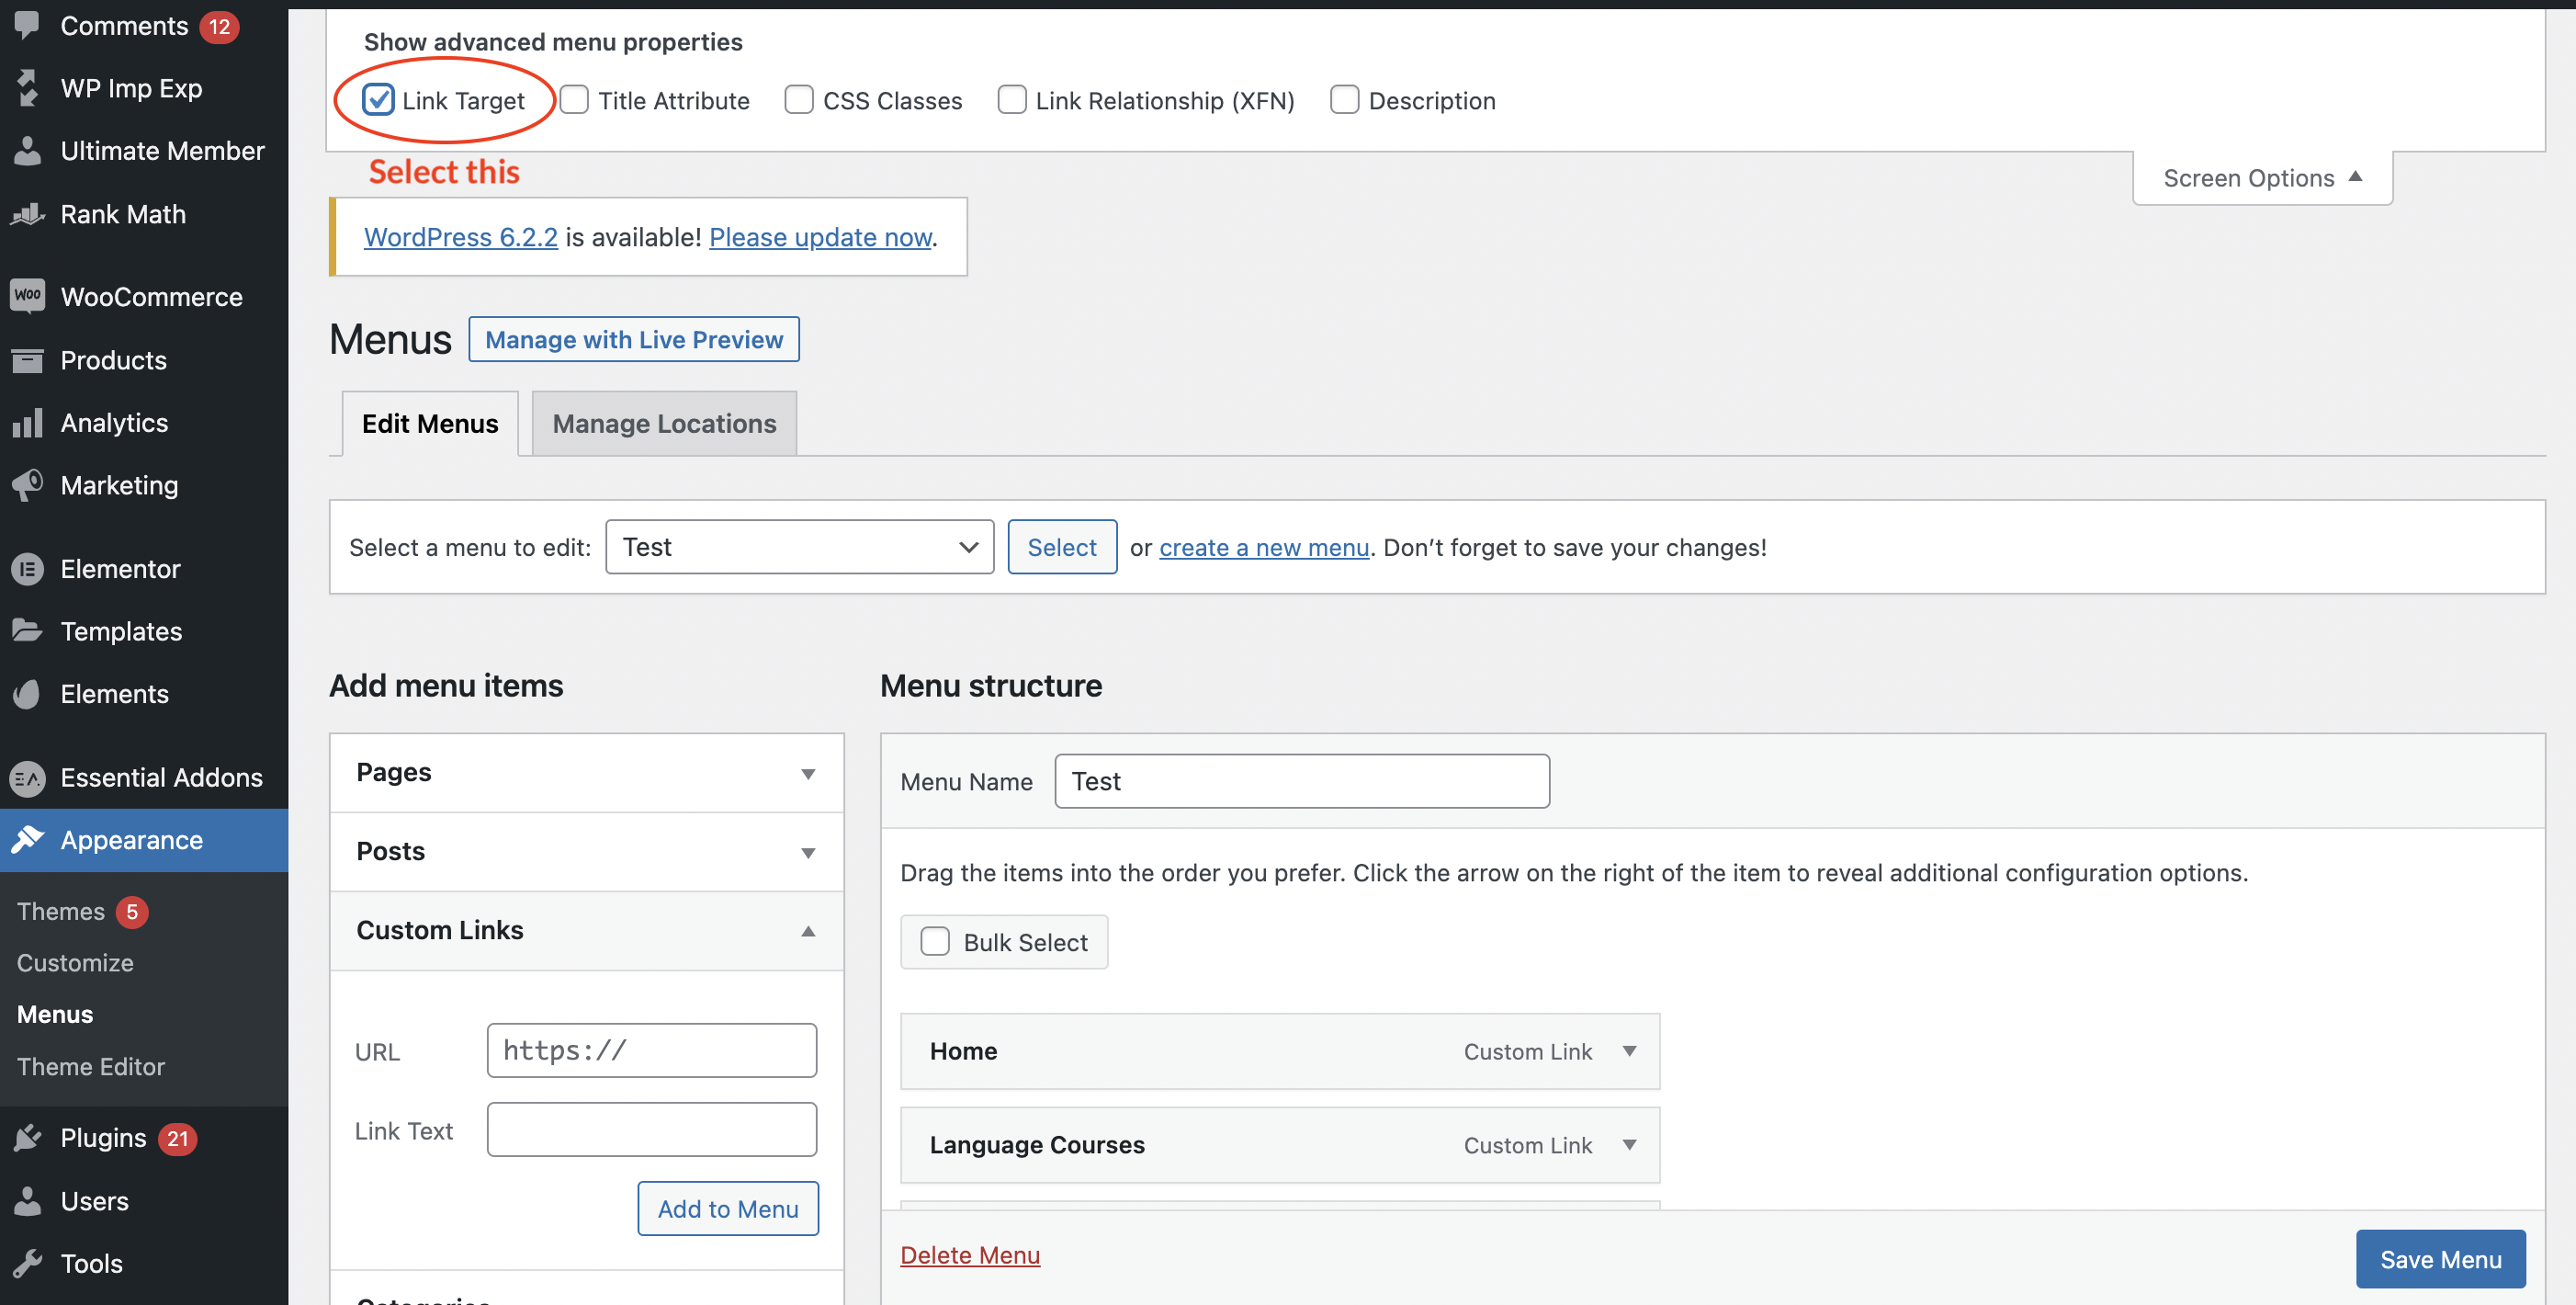
Access your WordPress Admin Panel and navigate to the "Appearance" section and click on "Menus".-png.png)
Step 2
In the "Menus" section, navigate to "Custom Links" and enter the URL of your EdCommerce platform, and the CTA text you'd like to have in your website's menu.
-png.png)
Then click on "Add to Menu" to include this new item in your main menu.
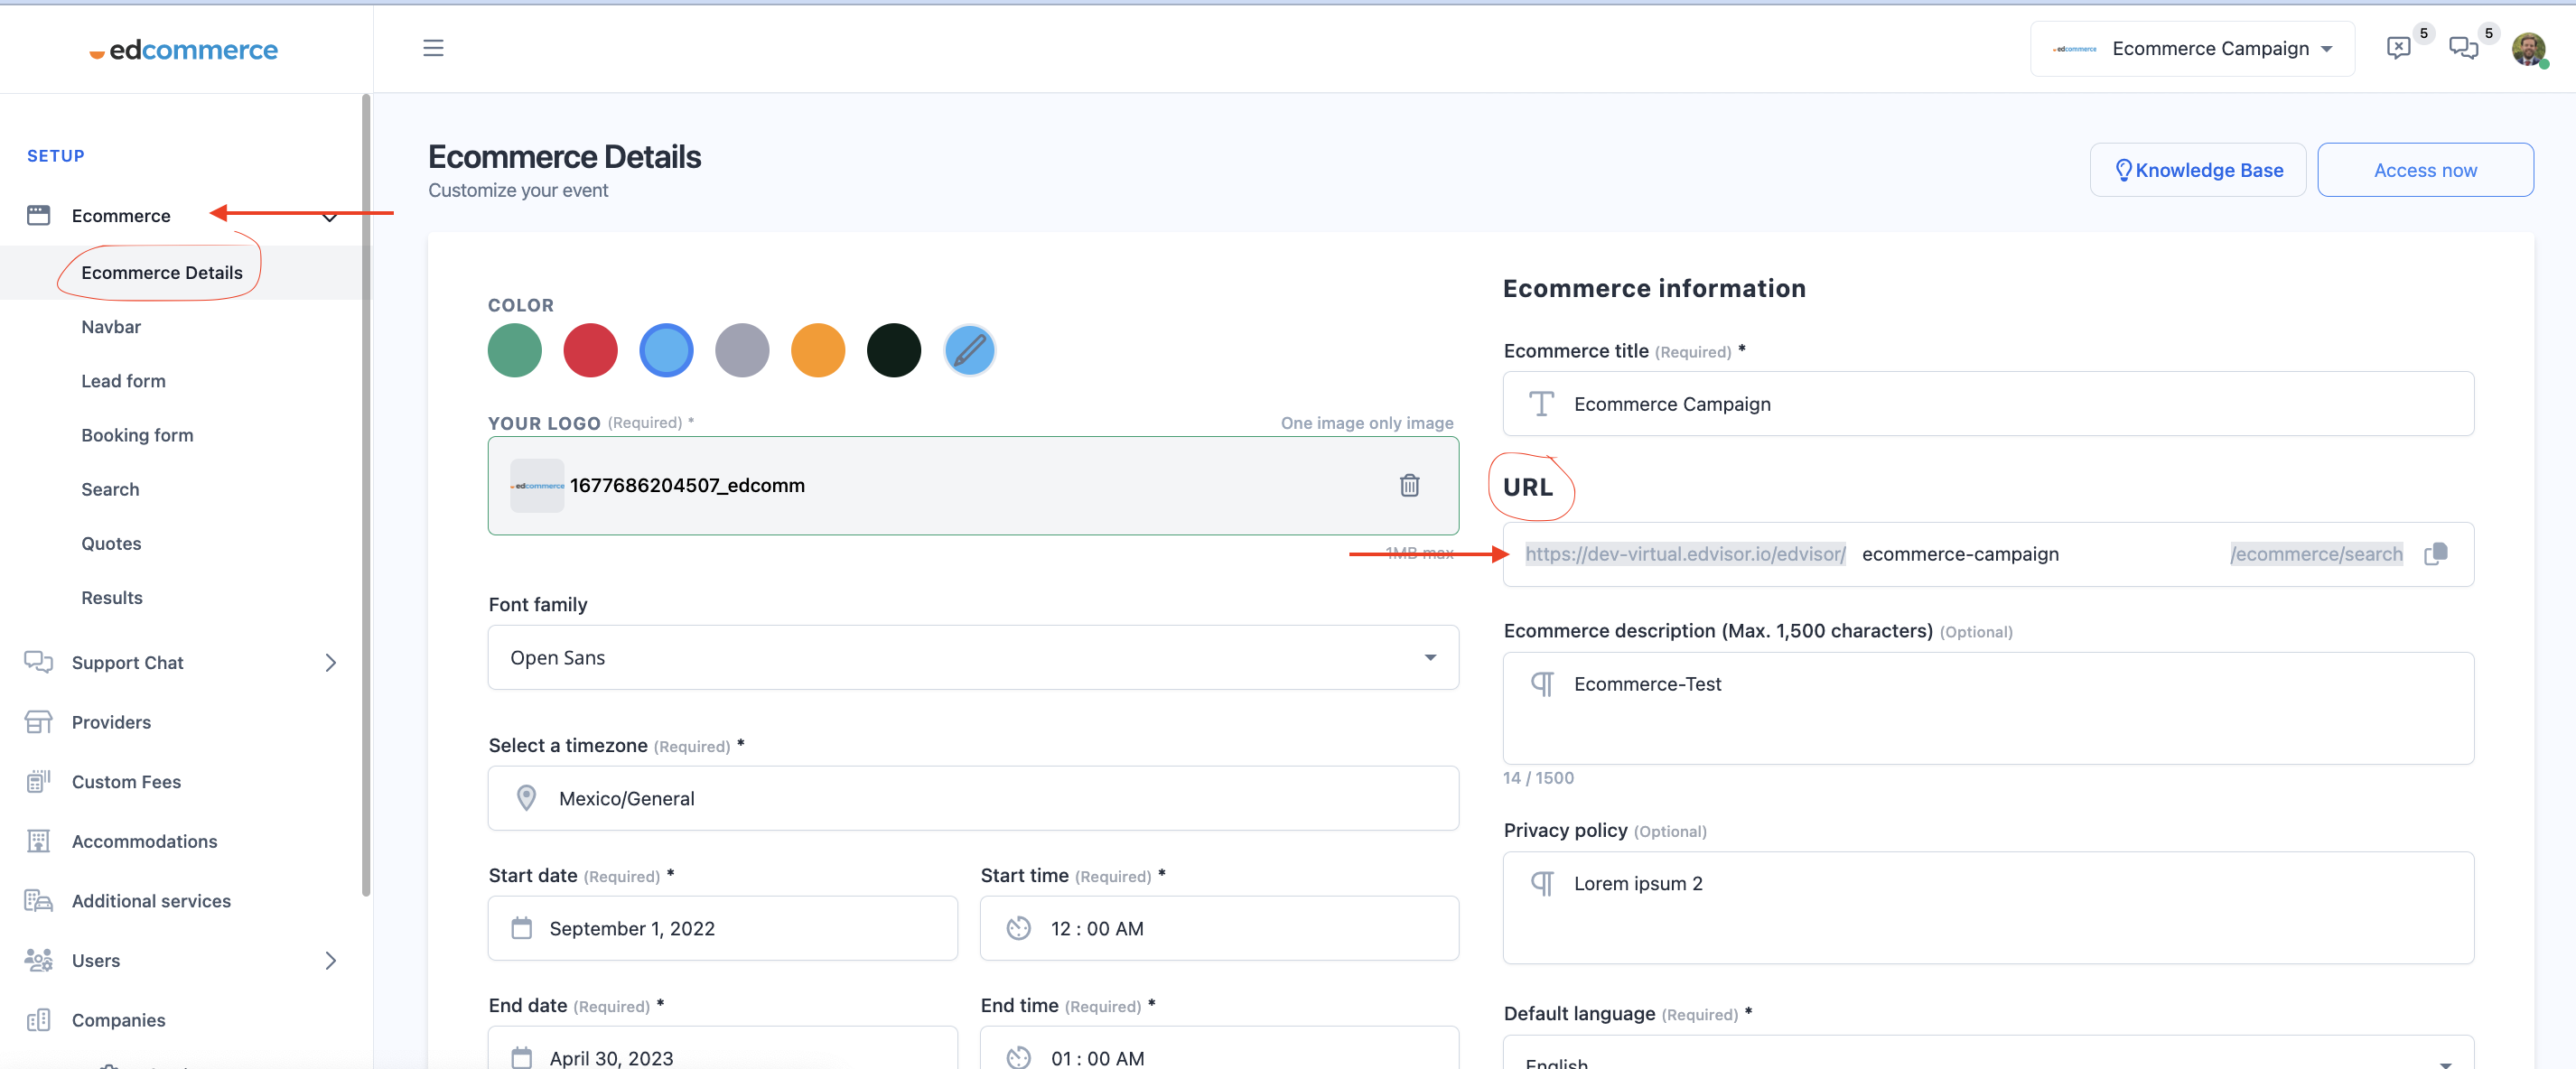
*To find your EdCommerce's URL, go to the settings section on your platform, click on "EdCommerce" and then "EdCommerce Details".
💡Pro tip! To prevent students from abandoning your page, make sure you customize your menu to open the link in a new tab.


This will open a new tab with your EdCommerce when students click on your EdCommerce button, without closing your website.
Step 3
Don't forget to save your menu.
-png.png)
Your students will enjoy using the EdCommerce site to easily find, quote, and book courses from multiple institution providers. With this platform, you can keep selling even when you're asleep, maximizing your revenue potential.
