In order to allow your team to begin connecting their Gmail accounts, you must first allow Recruit's API to access your Google Cloud Platform. Once connected, you will need to retrieve and paste two fields into Recruit, to complete the process - Client ID and Secret (Step #6).
To begin, you will need to ensure your Google Cloud Platform login/account has full Admin access to make the necessary changes.
Some technical knowledge about your Google Cloud Platform is recommended, but not required.
*(Find out if you have Admin access to make the required changes. Login and view all the roles by going to your Cloud Console IAM page and clicking on a project listed.)
⚠ To avoid potential issues and errors with the Gmail integration, it is important that you DO NOT have any test student profiles, that use the same email (Gmail) addresses you are trying to connect with. For example, if I am connecting my email 'fred@edvisor.io' - I must NOT have any students in my database with this same email in their profile.
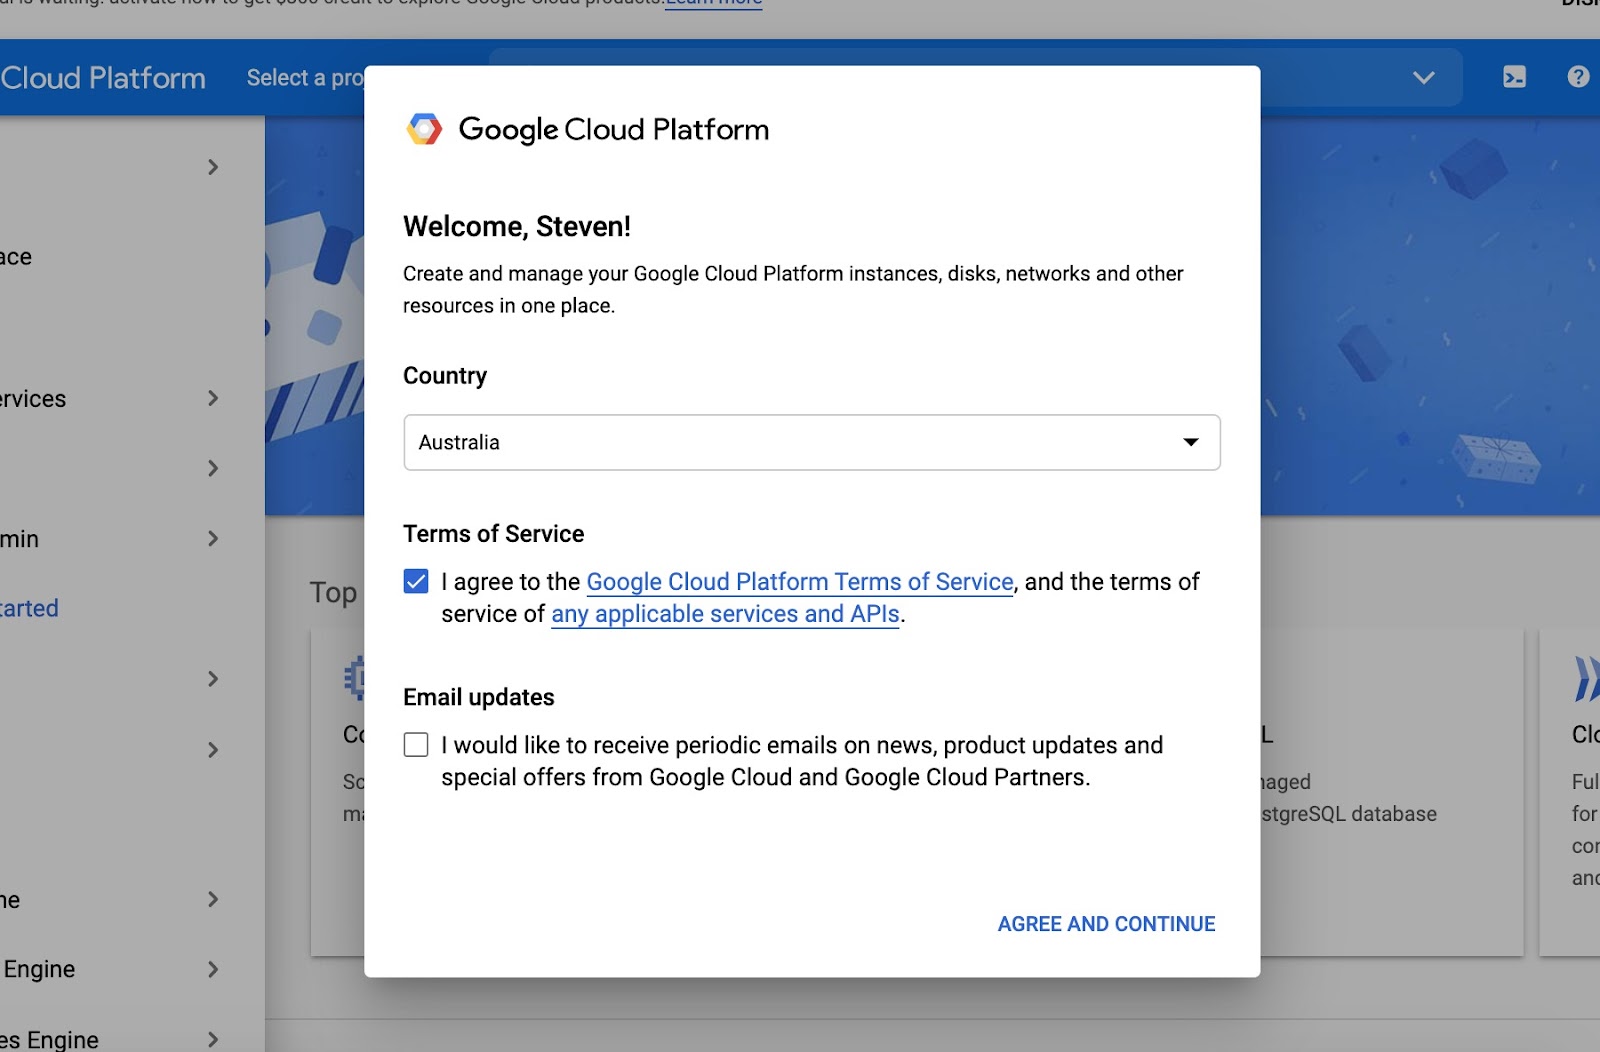
1. Go to: https://console.cloud.google.com/getting-started
> Enable Google Cloud Platform (with your GSuite account logged in)
> Login and Agree
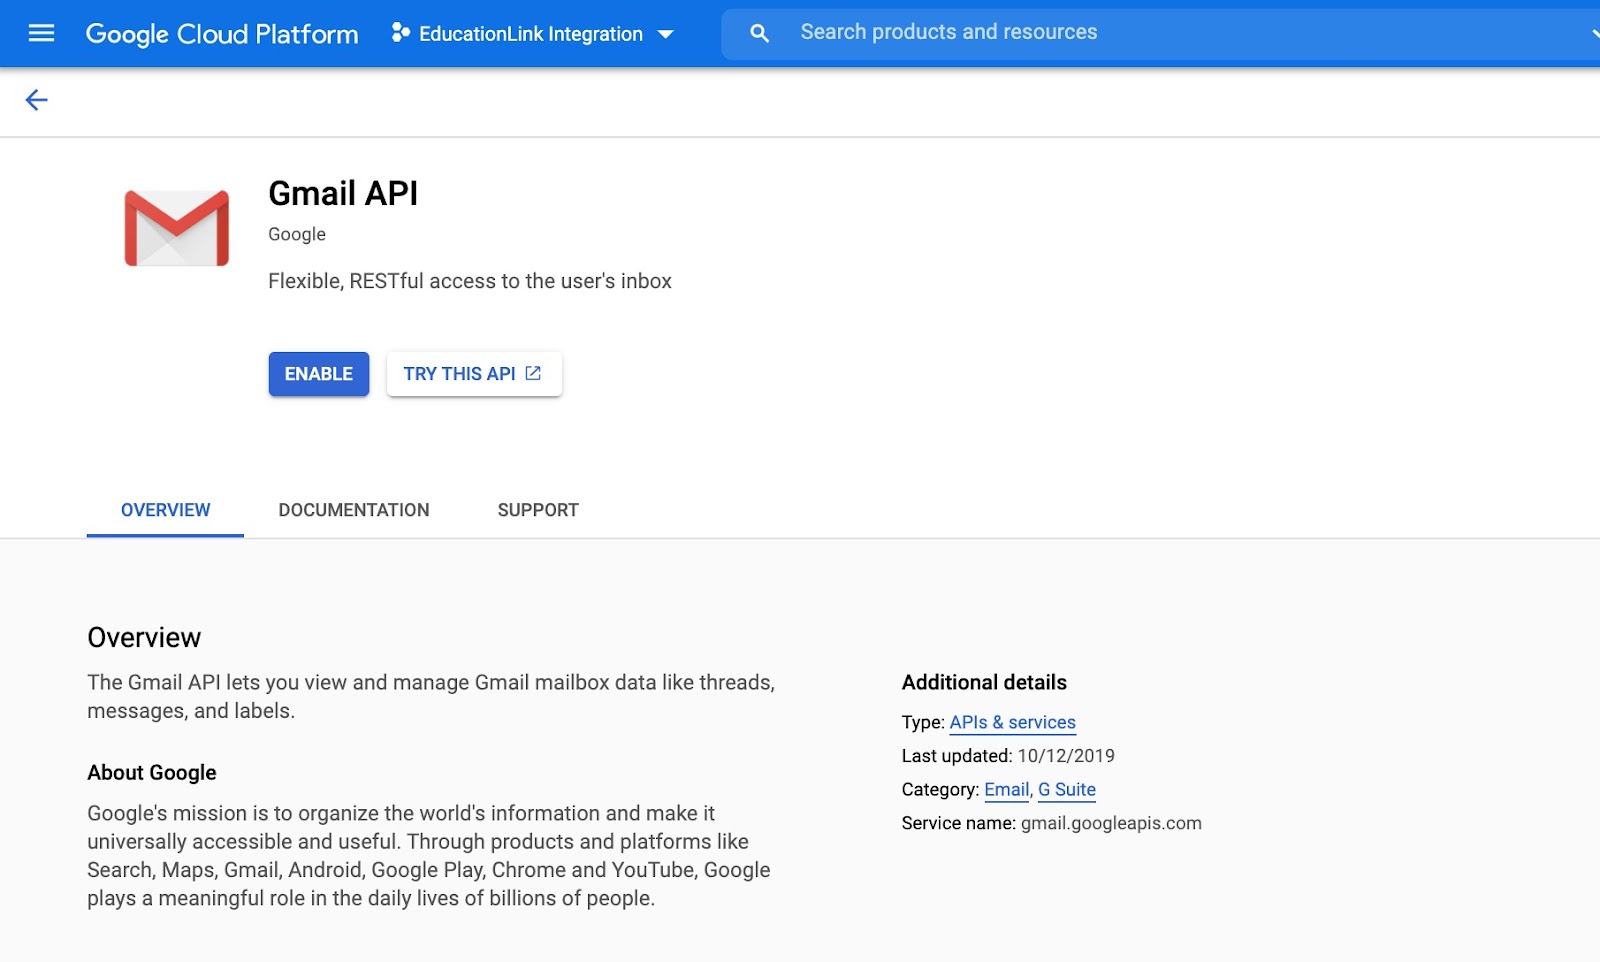
2. Go to https://console.cloud.google.com/apis/library/gmail.googleapis.com
> Enable Gmail API for your new application.
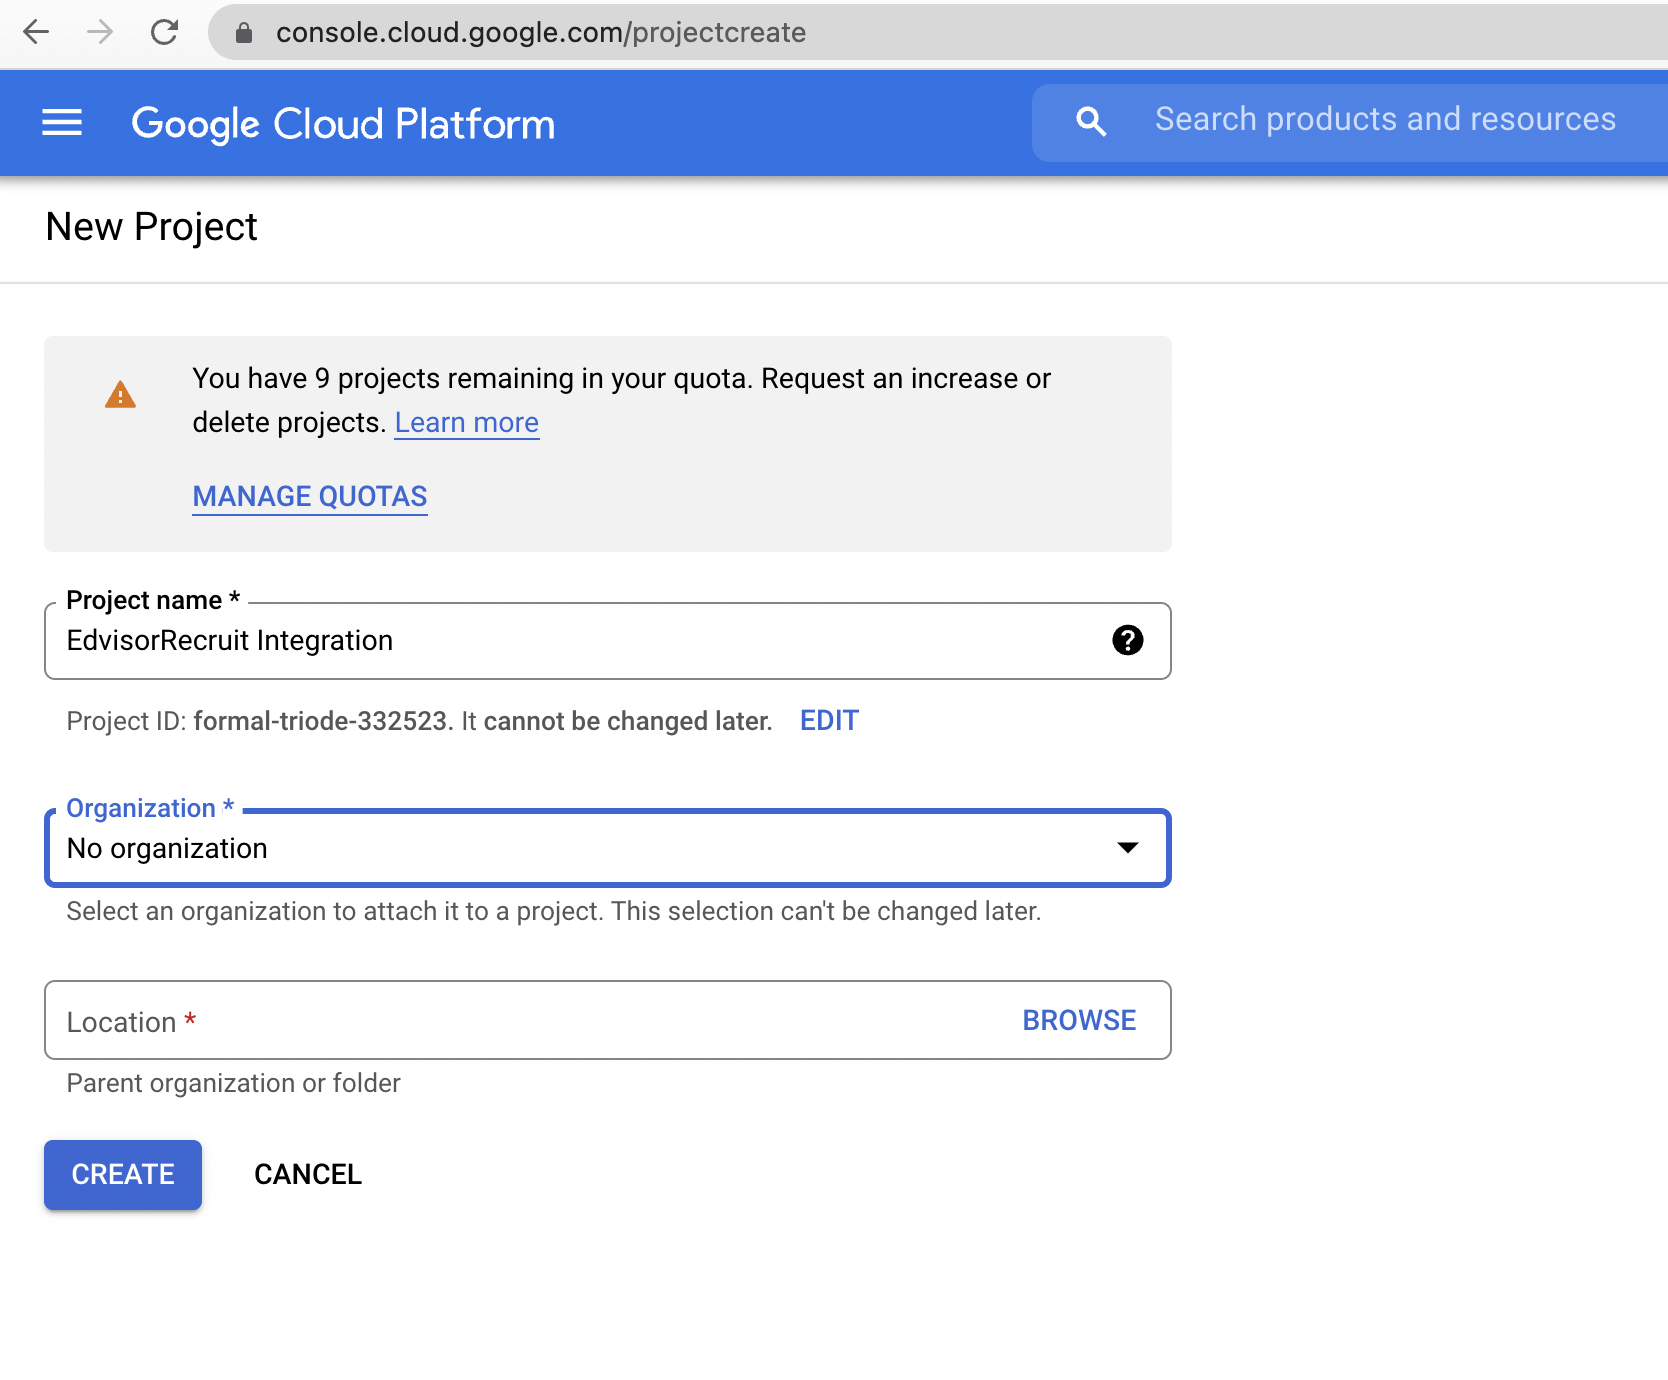
3. Go to https://console.cloud.google.com/projectcreate
> Add a new project (can be named "EdvisorRecruit Integration")
> Select any default location (folder) by clicking 'Browse'; cannot be left blank
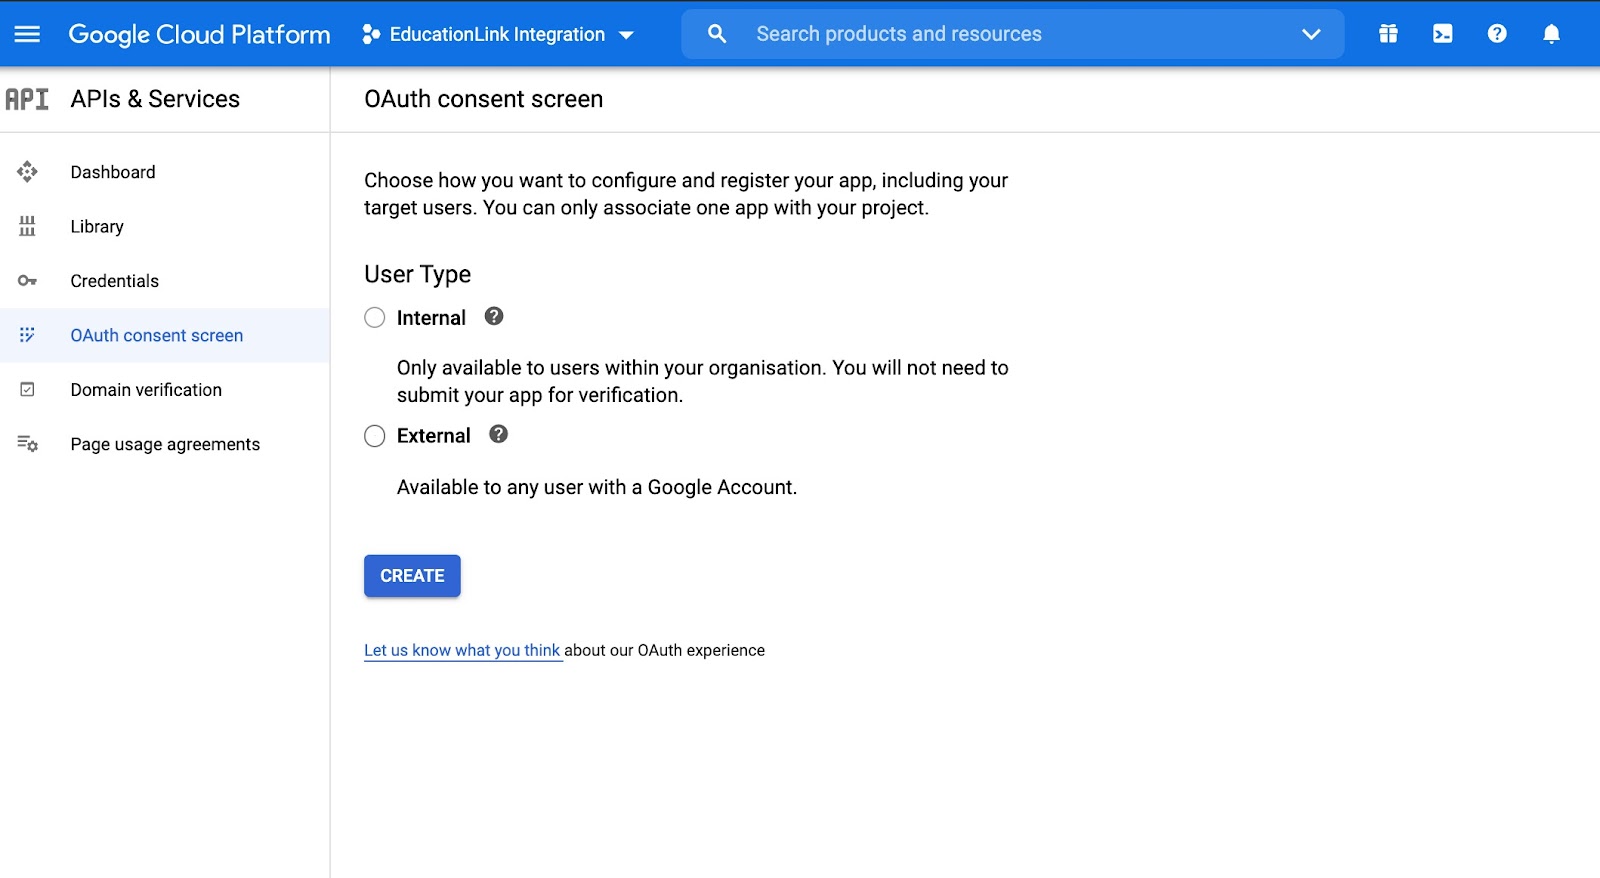
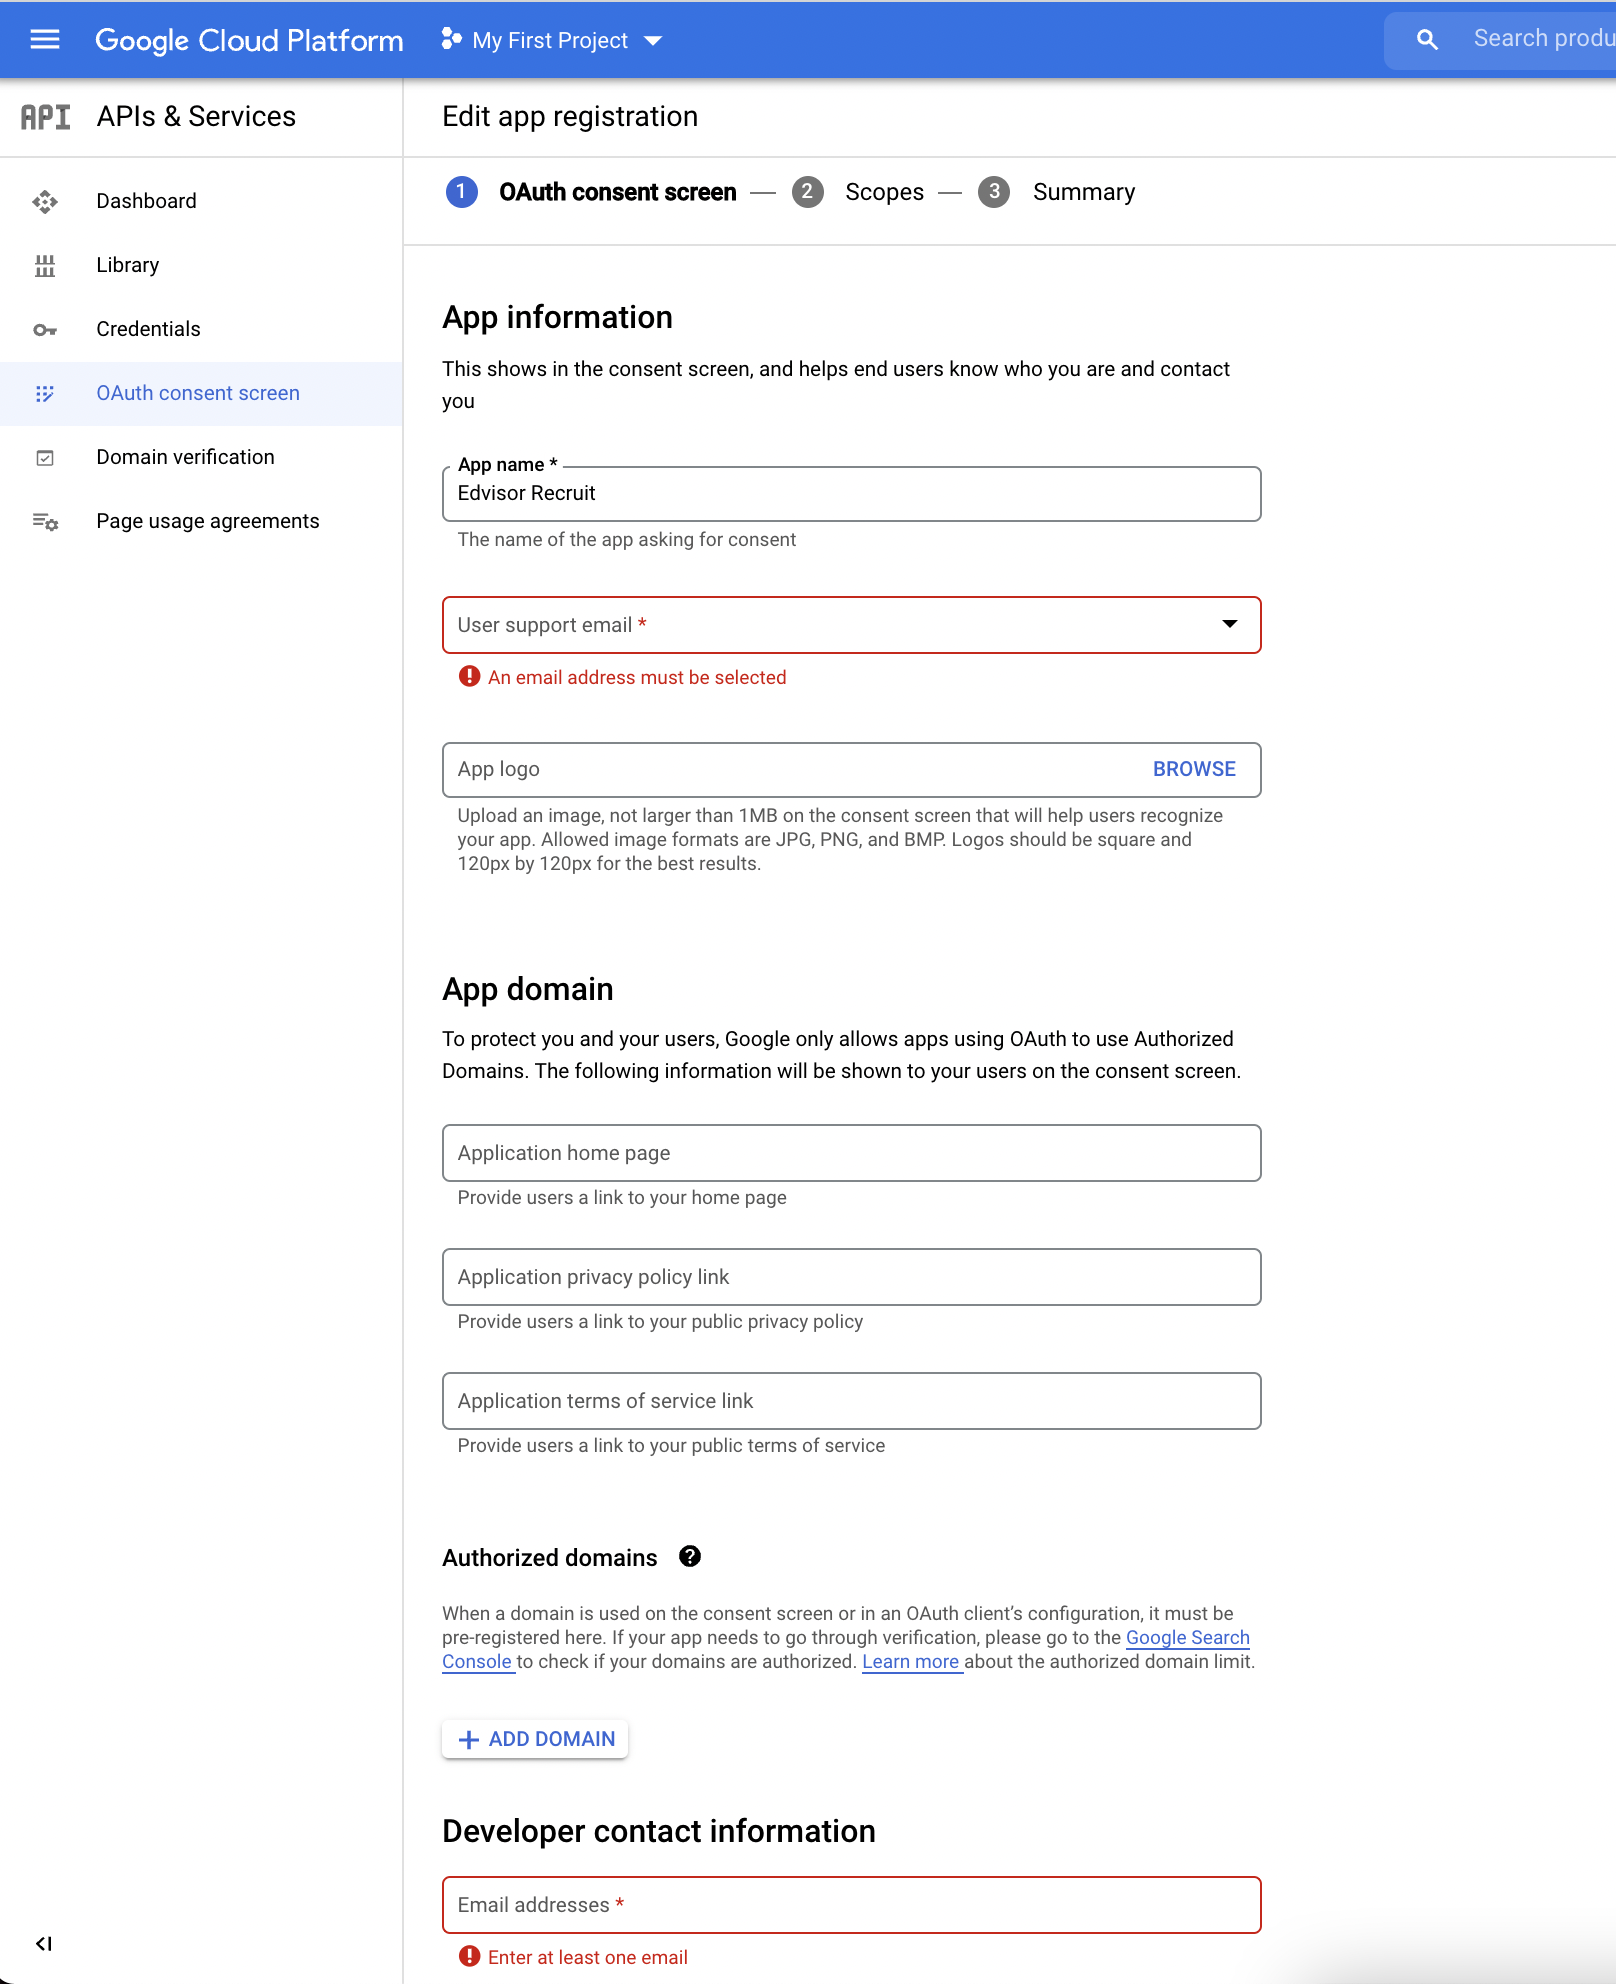
 4. Go to https://console.cloud.google.com/apis/credentials/consent
> Goto the 'OAuth consent screen' (left menu)
> Select and create an "Internal" type OAuth consent screen.
> Fill out the App name as 'Edvisor Recruit'
> Add any email (your own) at both the support and developer email (mandatory)
> Leave all other fields blank
> Save and Continue
5. Go to https://console.cloud.google.com/apis/credentials
> Create a new 'Credentials' under OAuth consent screen.

> Application type "Web application"
> Name can be kept with the default or create any name you want to use
> Under "Authorised redirect URIs", it is important to add 3 URIs:
- https://app.geteducation.link/_oauth/google?close
- https://providers.geteducation.link/_oauth/google?close
- https://recruit.edvisor.io/_oauth/google?close
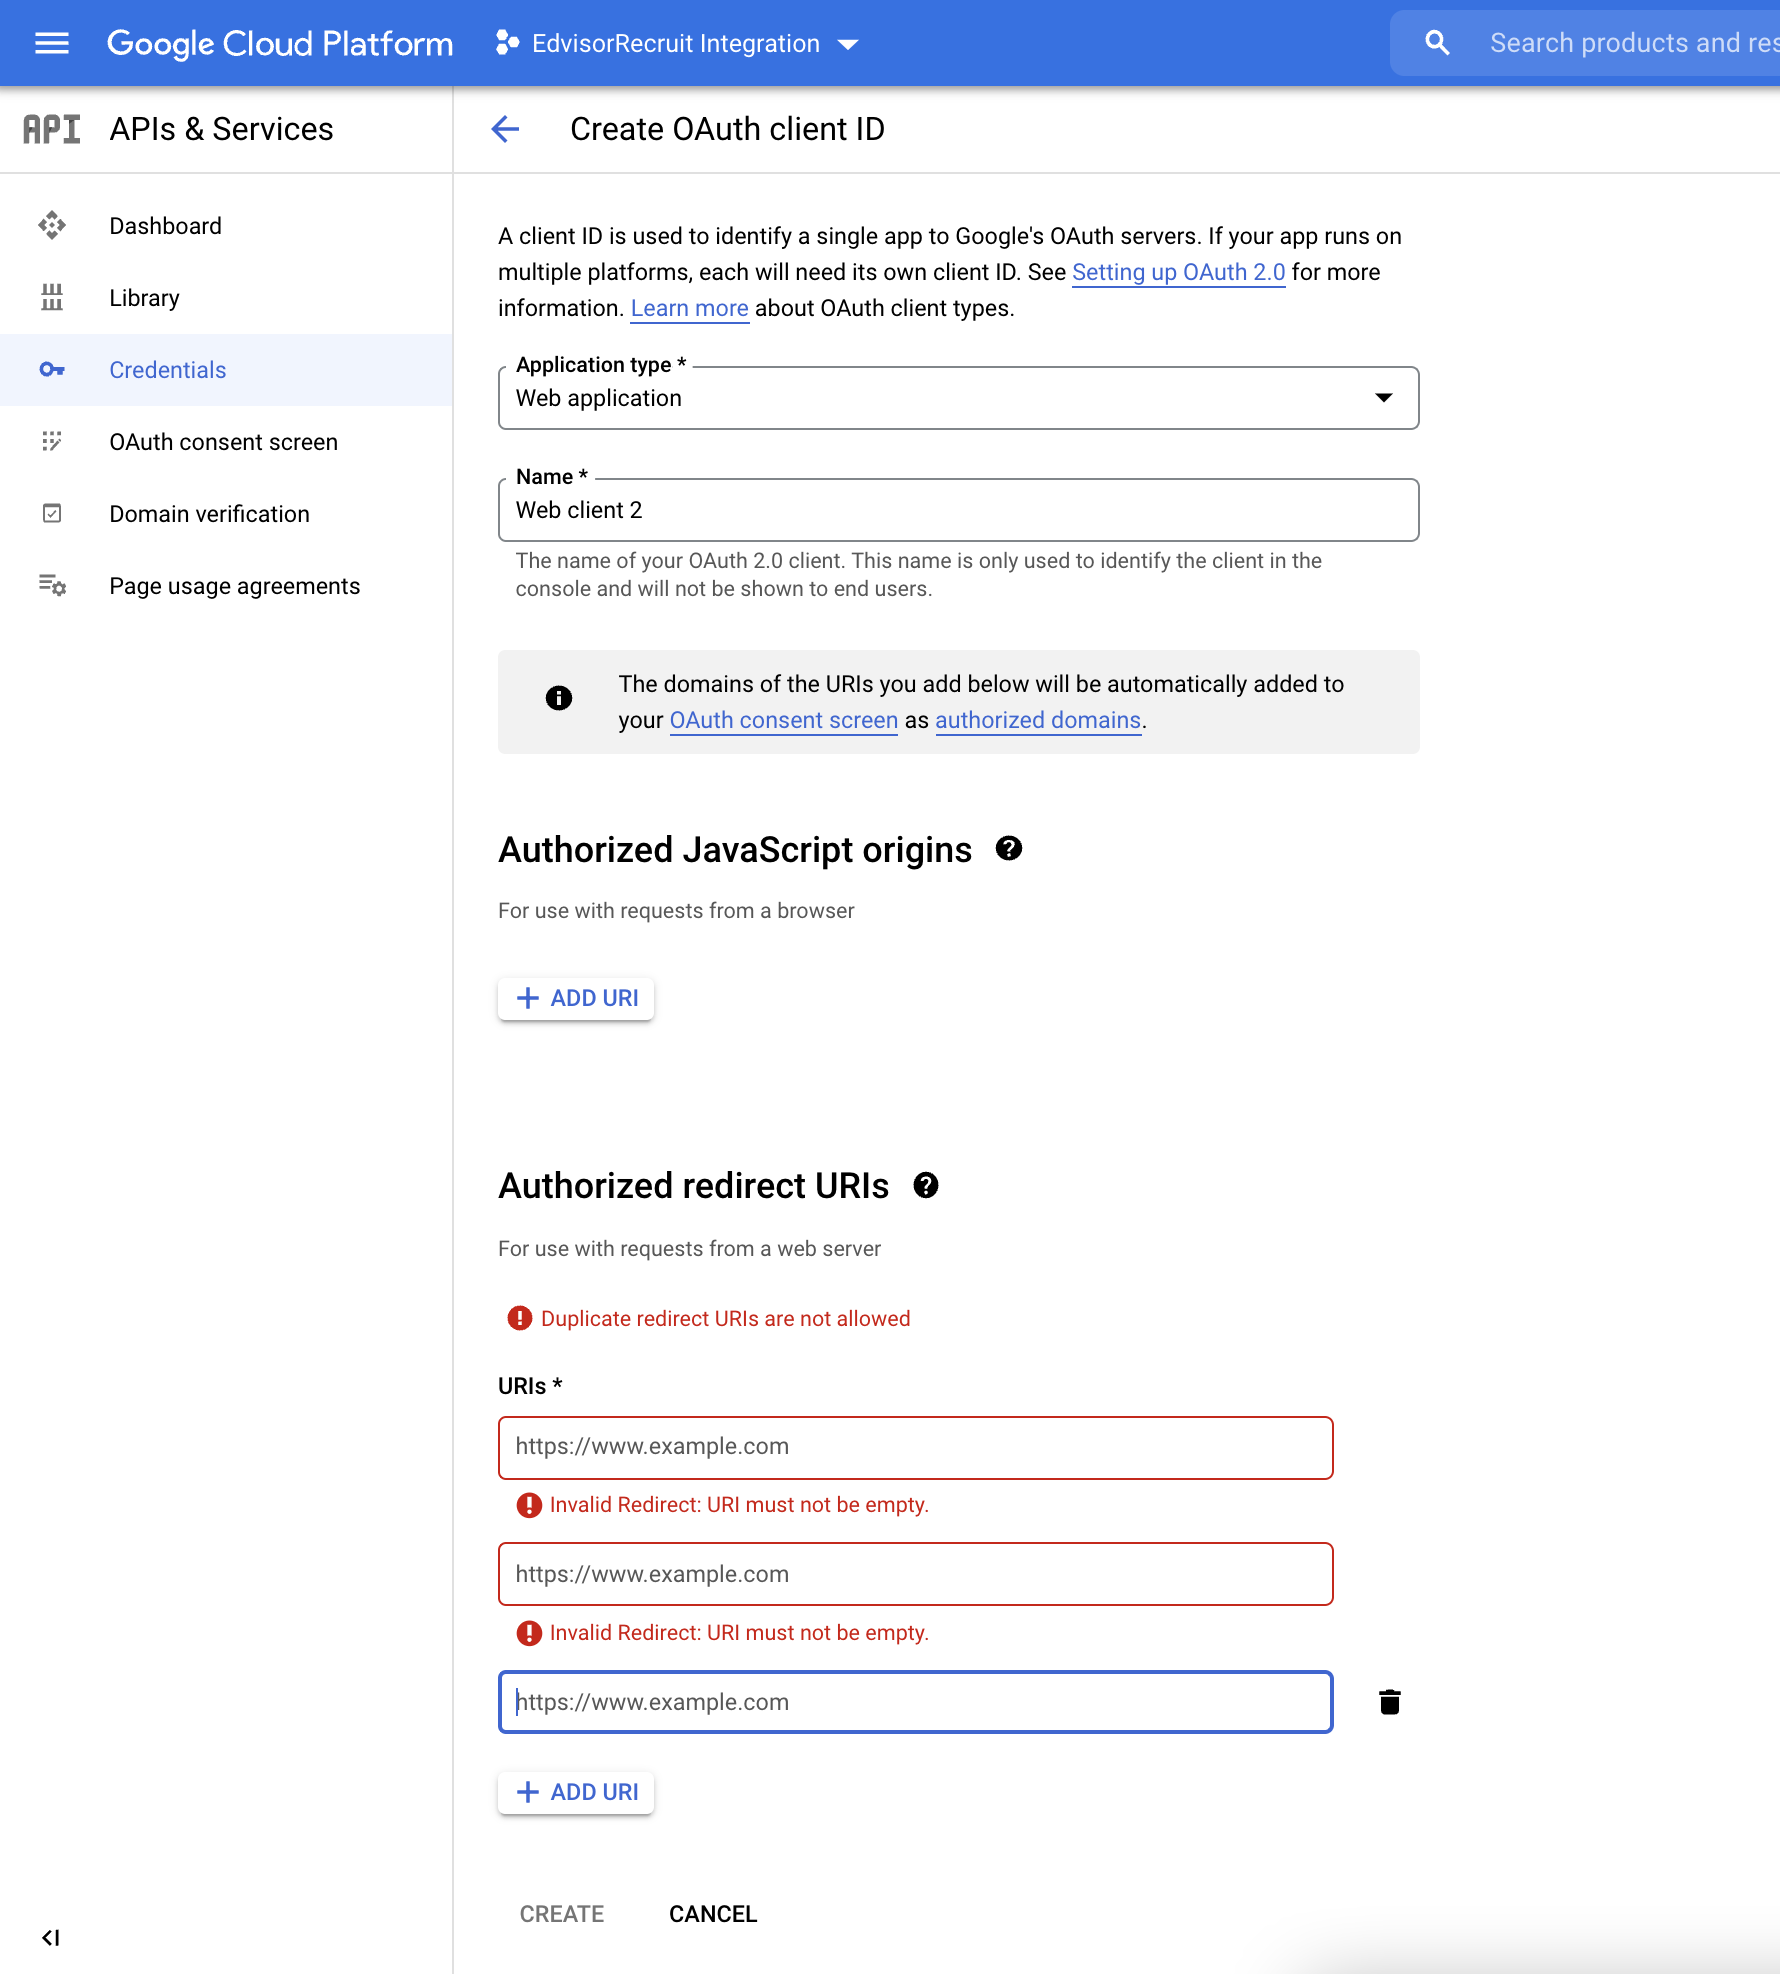
> After you "Create", Google will provide you with the "Client ID" and "Client Secret".
> Copy these values

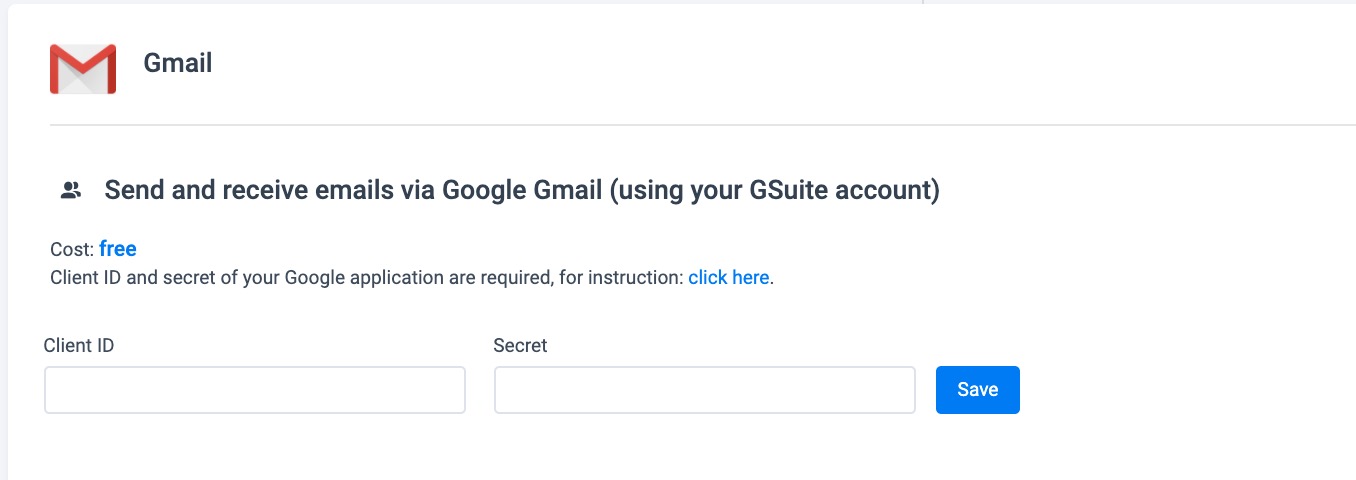
6. Go to: https://recruit.edvisor.io/organization/add-ons
> Copy and paste "Client ID" and "Secret" to Gmail add-on settings.
Now, users in your organization can connect their Gmail accounts to Recruit (Personal Settings > Connect to Google):
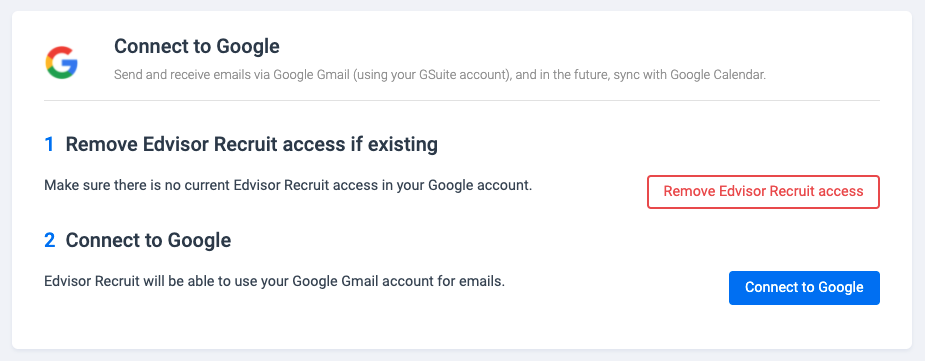
> Click Connect to Google
> Follow prompts to allow access
You will now be able to send emails directly to Students via Edvisor Recruit. Responses will be received in your Gmail client (outside of Recruit). For users who are on the Expert Recruit plans, or have paid for the Gmail add on "a la carte", this is just the first step.
To complete the full Gmail integration and store all emails between you and your Students, in Edvisor Recruit ( and store all emails sent/received, regardless of device/app), please follow the instructions and read this article:
Gmail Add On - Store all emails sent and received in the student profile