With the 'pages' feature on EdCommerce you can effortlessly build stunning landing pages to showcase your study abroad programs and courses without any programming knowledge.
In this guide, we'll walk you through the steps to configure and utilize "Pages" effectively:
3. Customize each content block
1: How to create a landing page
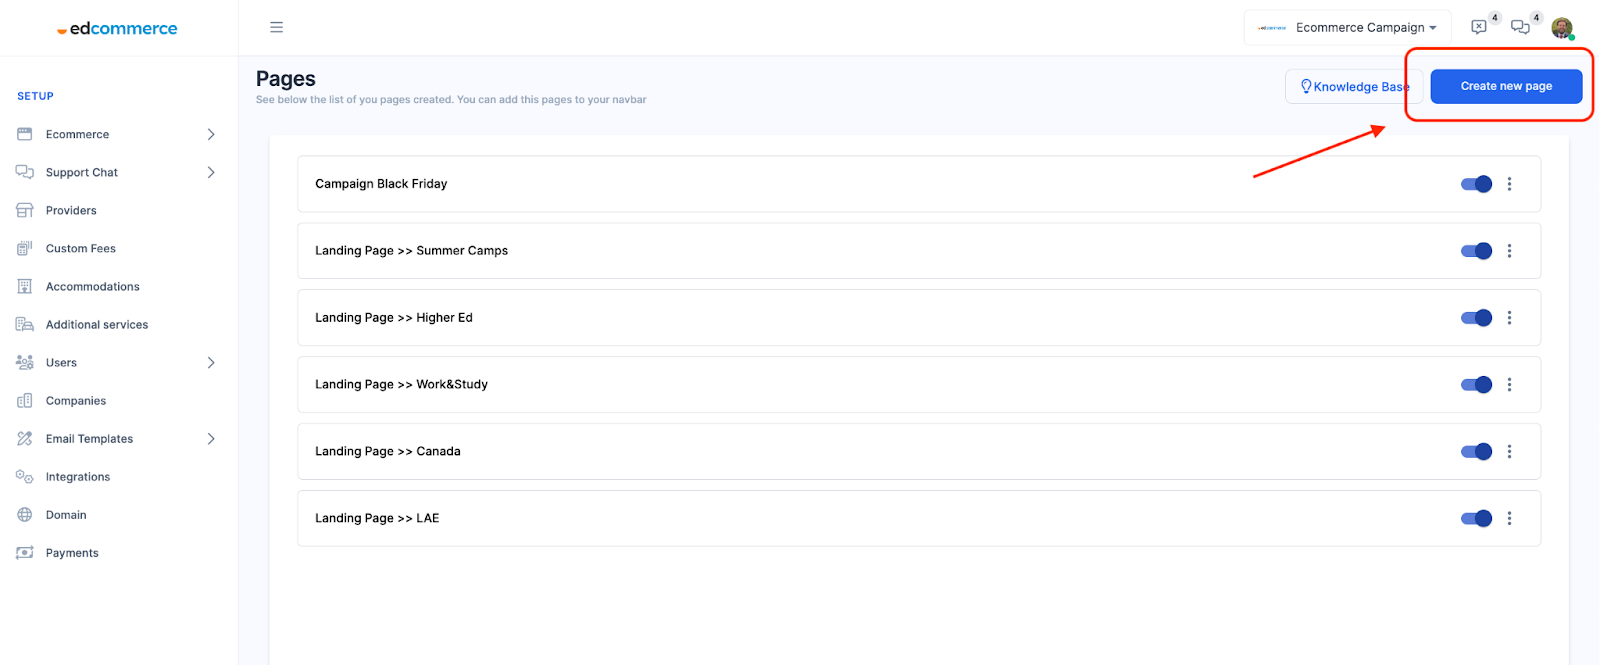
Access 'Pages'
Go to your EdCommerce Setup page > Ecommerce > Pages:

Create a new page
Then, click on the "Create New Page" button.
Give your landing page a nice title and a brief description. This will help you identify it later.
Select a template:
Choose from a variety of designed templates (banners, program carousel and lead form options) tailored for educational agencies and institutions.

2. Build your page structure
The 'Pages' feature comes with "Drag and Drop" functionality, letting you easily move pre-built elements from the left menu, to your landing page (in the right side).
This way, you can build your page without needing any coding skills.

💡 We suggest first setting up the basic structure of the landing page you'll be using. Once that's done, you can go ahead and customize the different sections.
3. Customize each content block
Now that you've set up the structure of your landing page, it's time to personalize each section.
In each content block, you'll find various buttons that help you adjust text, add images, and even change the layout, making it easy to tailor the content to your specific needs.
Elements that can be customized within content blocks are:

Title / SubtitleTo change the text content, simply hover over the text, click on it, and edit the default content. |
|
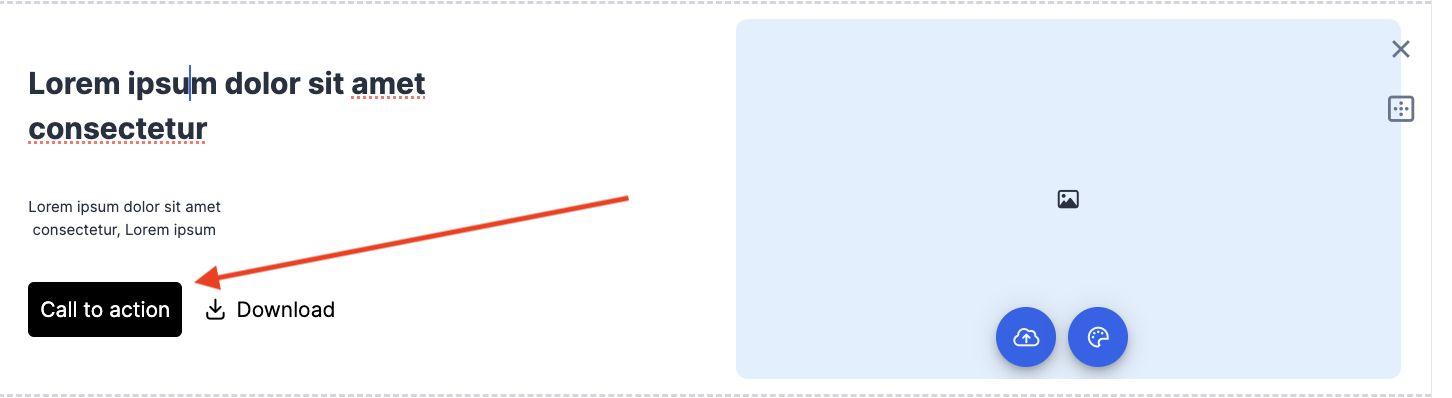
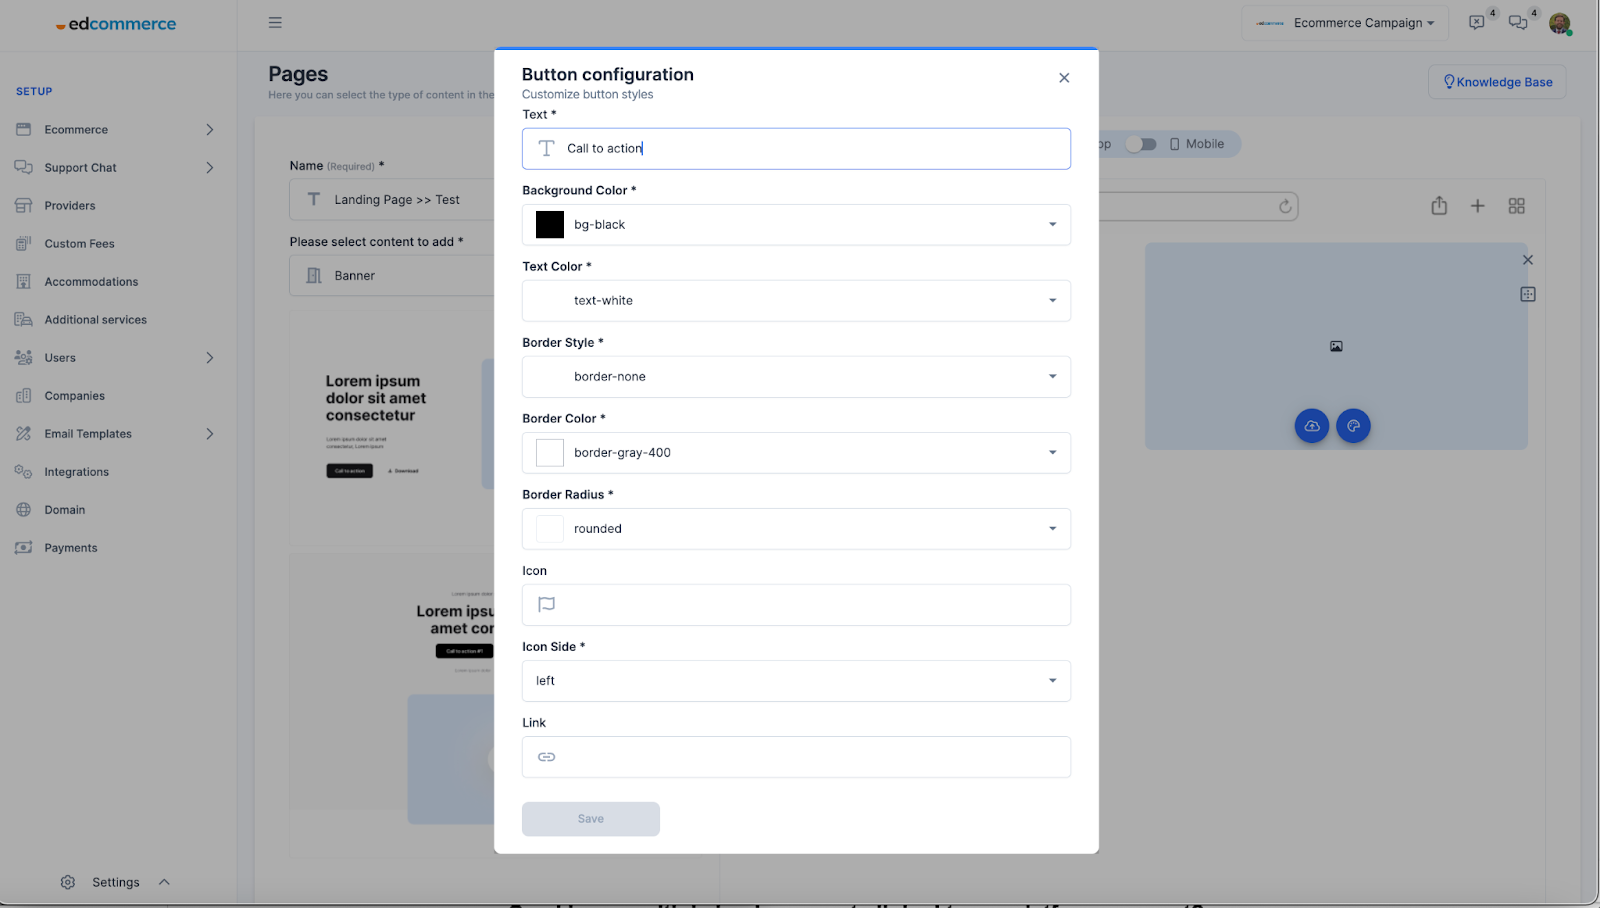
Call to Actions (CTAs) / Buttons
To customize CTAs, just click on the button. |
|
ImagesTo upload an image, just click on the upload icon in the image box. You can add one or multiple photos to create a carousel. |
 |
VideosTo publish a video, select a content block that has video options. Then click on the icon in the blue box and enter the URL of your video. |
 |
PaddingsFor content spacing in your page structure, there's a button that lets you fine-tune both horizontal and vertical spacing for each block on the page. |
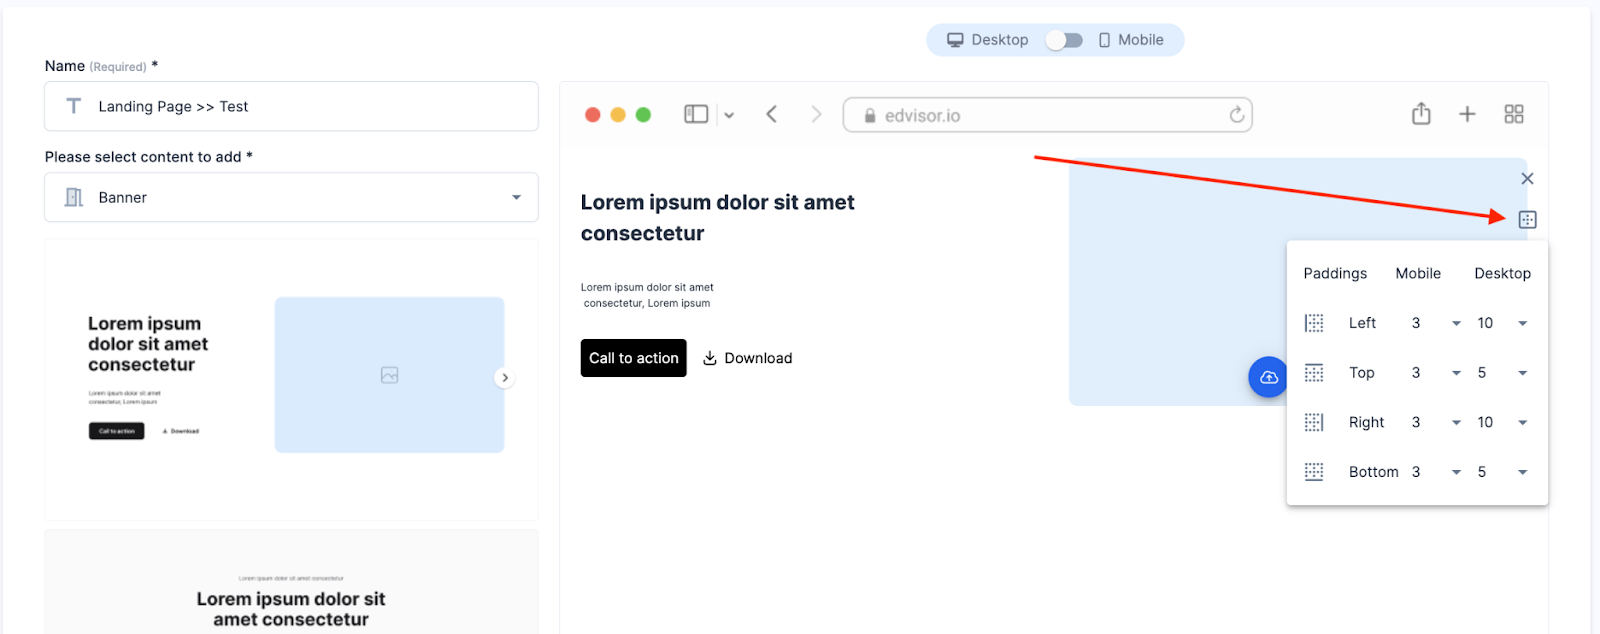 |
CoursesIn the section for publishing courses, we recommend not using carousels with more than 6-8 courses. |
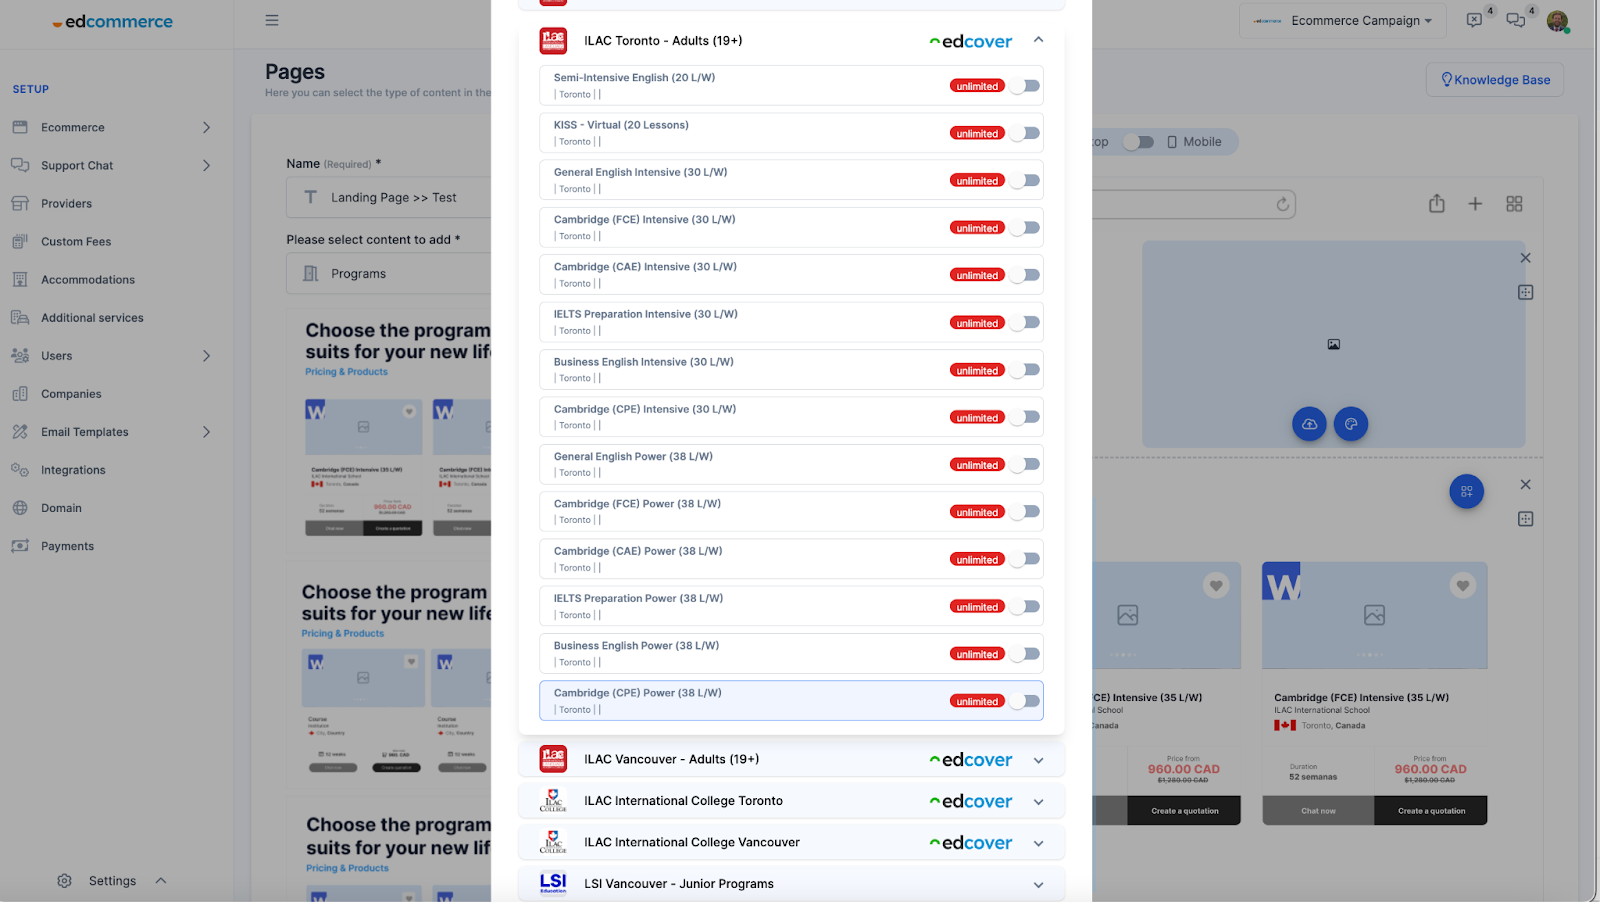 💡 We recommend adding no more than 2 carrousels, to keep user attention focused. |
Lead FormIn this section, you can choose from various form design formats and edit the title and subtitle. |
💡 These types of pages are perfect to receive better quality leads. |


4. Publish your landing page
Once you've finished configuring and saving your template, a section will appear listing all the pages you've published. In this area, you can edit, delete, and access the URL of each created page.

With the "Pages" builder, crafting engaging landing pages for educational agencies and institutions is now a breeze. Just follow these steps, and you'll be well on your way to successfully promoting your study abroad programs and courses. Happy building!