EdCommerce offers a powerful feature that enables you to create and personalize different lead and booking forms, making it simple to gather the right information from your leads and bookings.
You can also embed your lead forms on other pages of your website, enabling lead collection not just from your online store, but from any webpage.
These leads will then be synchronized with your Edvisor account, automatically assigned to the right counselors, and added to the appropriate pipeline and stage.
Let's see how you can customize your lead forms!
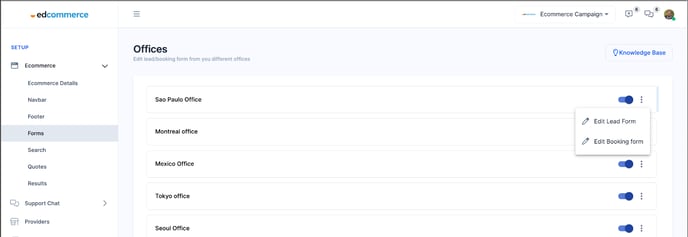
🔹Navigate to: Settings > Ecommerce > Forms.
In the forms section, you'll see a list of all the offices linked to your Edvisor account.
When students visit your forms, they'll be asked to pick the office they want to hear from. The system will then show them the right form based on what they choose.
Then, click the 3-dot icon next to each office, and select the form you'd like to edit.
Editing your lead forms
The lead form page is divided into 4 sections:
- New Form: To add, remove or rearrange your form fields.
- Assignation: Here you can create rules to automatically assign leads to specific counselors within a designated pipeline, depending on their form responses.
- Assignation Rules: In this section, you can establish rules to prevent errors or duplicate entries when users already exist in the database.
- Terms & Privacy: You can also add your own Terms & Conditions and Privacy Policy to your forms.
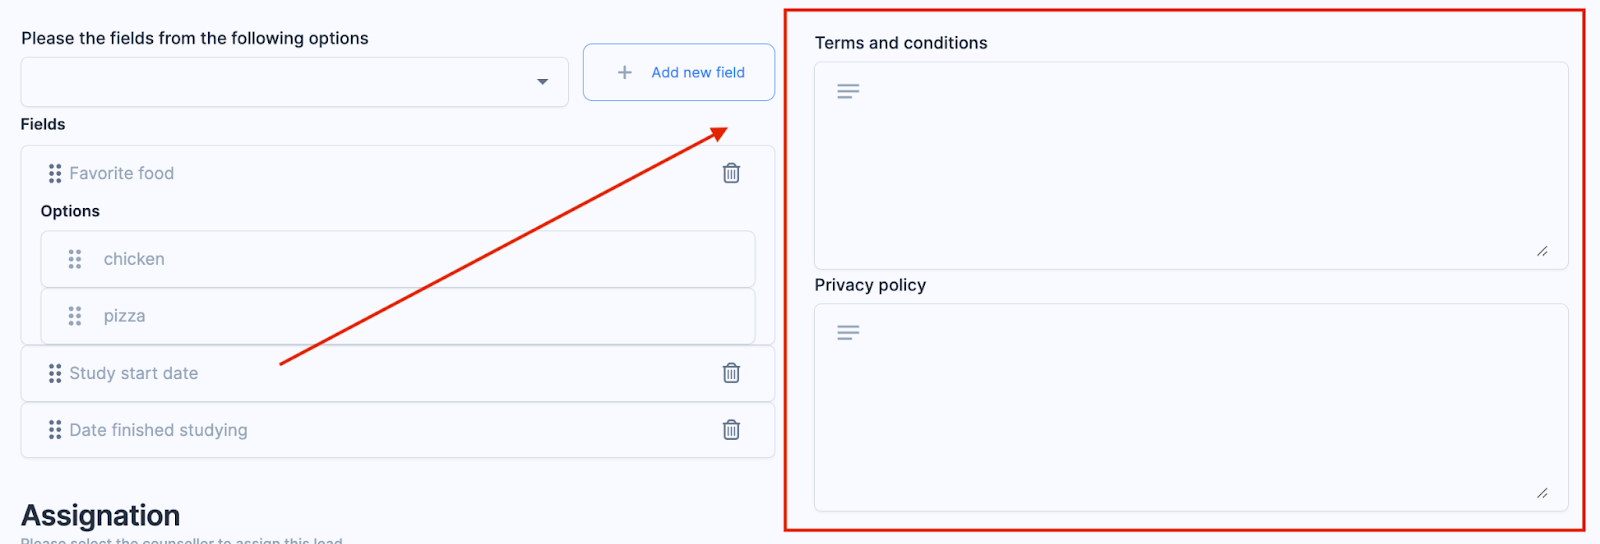
New Form

In this initial section, you have the freedom to modify the form according to your needs. You can add, remove, or rearrange all your fields for a tailored data collection experience.
This customization capability allows you to ensure the form gathers precisely the information you need from your leads, to streamline your lead generation process.
ℹ️ The information you have established in your Edvisor account, such as country, phone number, destination, and other relevant details, serve as form fields within EdCommerce.
When a student fills out a form on your website, these properties in Edvisor are updated accordingly.
You cannot create new fields directly in EdCommerce. If you wish to add new custom fields, you must first create them in your Edvisor account.
This step ensures that the information in both Edvisor and EdCommerce is identical, thus preventing any data synchronization errors.
Assignation
Here you can create rules to automatically assign leads to specific counselors within a designated pipeline, depending on their form responses.
Begin by adding all the counselors to whom you wish to assign incoming form leads. EdCommerce will systematically distribute these leads among them.
Next, select the suitable pipeline and define the status of these new leads.
This streamlined procedure ensures a swift distribution of leads to the appropriate counselors, improving your workflow and increasing your conversion possibilities!
Assignation Rules
 |
You also have the ability to set up rules that prevent errors or duplicated entries when a lead already in your database completes the form. You have three options to consider:
|
By configuring these assignment rules, you can efficiently handle leads that are already in the system, ensuring accurate information, appropriate counselor allocation, and seamless continuity in the pipeline and status management.
Terms & Privacy
To finalize your form setup, we strongly advise incorporating Terms and Conditions and a Privacy Policy.
These crucial elements offer clarity and legal safeguarding for your users. By including these components, you help create a thorough and legally compliant user experience.